Eddy Current Array Raises the Bar for RCS Steel Bar Inspection
Ask an expertRound corner squares, or RCS, are large steel bars with a square profile used in a variety of manufacturing processes. When they are not quite straight enough to fit in inline inspection systems, manual inspection is required. The core can be inspected using standard ultrasonic testing systems, but the surface needs another inspection solution for the detection of surface-breaking cracks and manufacturing flaws. Until now, this task was typically performed using magnetic particle testing, which required operators to perform long shifts of repetitive motion managing a heavy magnetic yoke. This can prove to be both time consuming and hurtful for the operators, causing strain-related injuries. This demonstrates the need for an alternative non-destructive testing method that would meet the detection performance required while making it more ergonomic. To tackle this challenge, the team at Eddyfi Technologies is proud to present a robust and elegant solution based on eddy current array.
The Challenge
Improve surface inspection of round corner square steel bars by replacing labour-intensive magnetic particle testing.

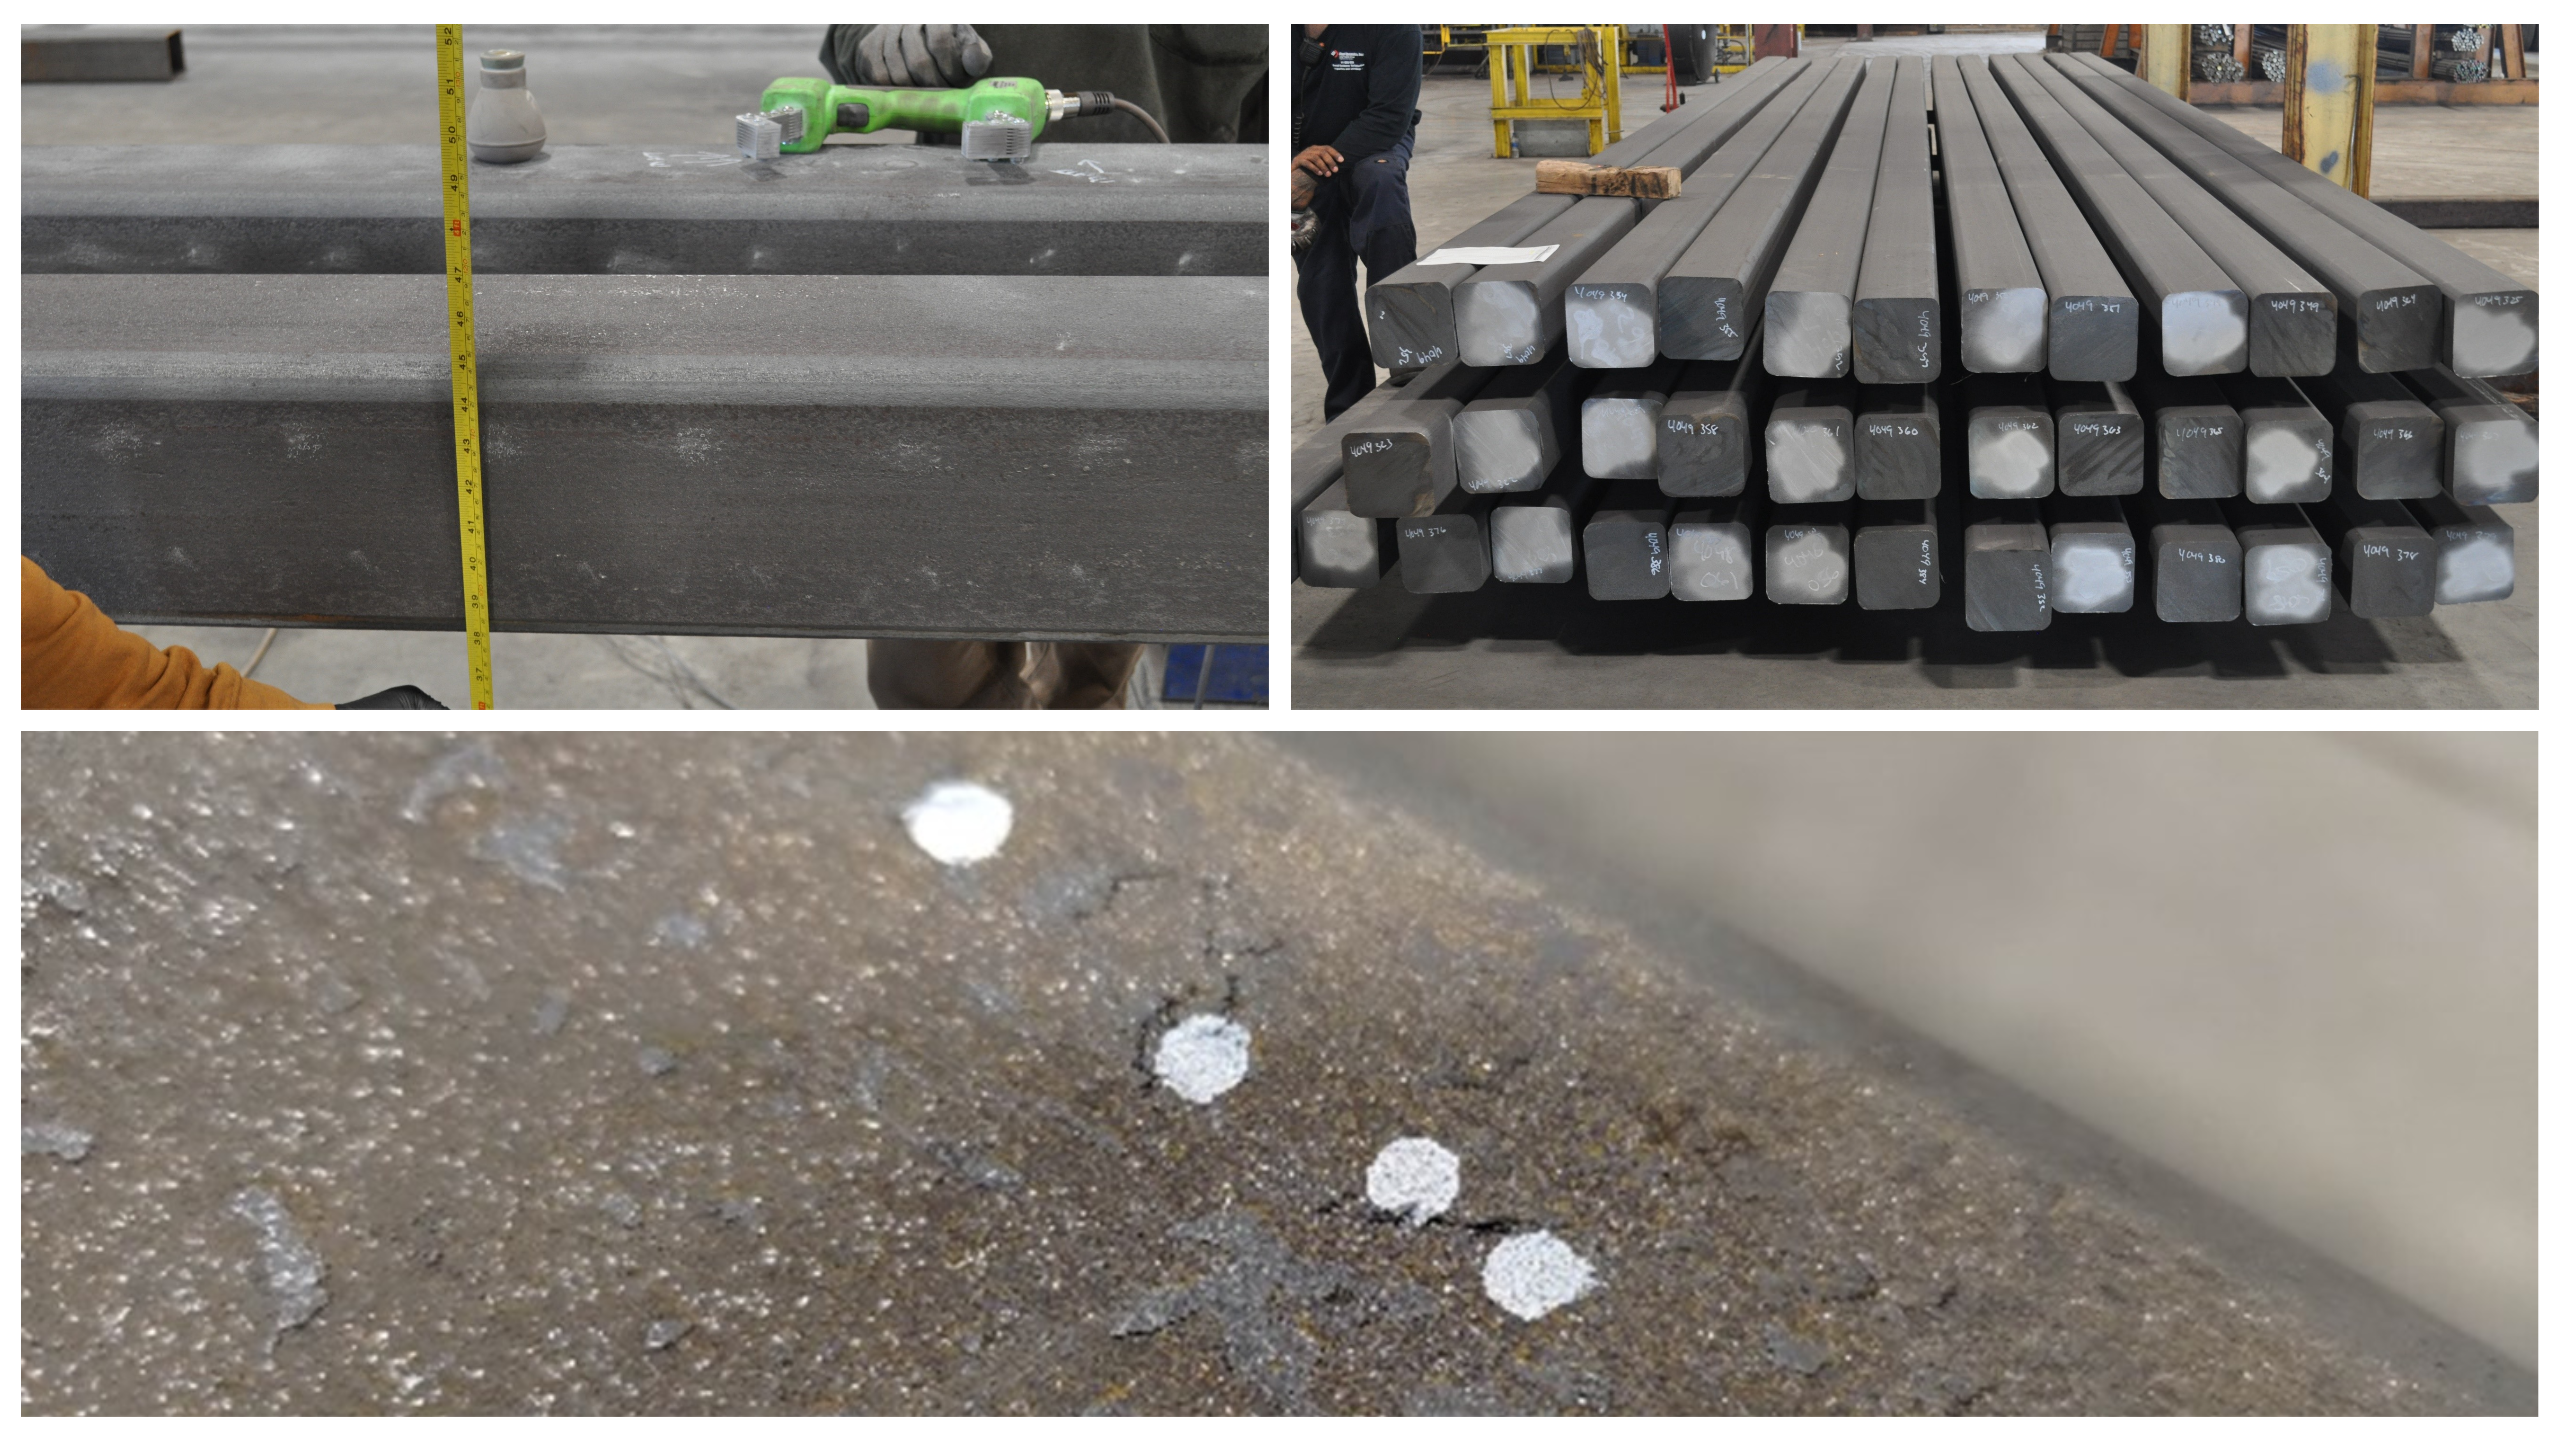
Figure 1: Round corner square billets need to be inspected, with a close up of typical indications that need to be detected.
Round corner square billets are large engineering steel bars mainly used in forging steel parts. Smaller bars can be sent through a straightener then passed through fixed inline inspection equipment. Larger size bars can be harder to straighten and thus may not be sent to inline equipment without risking that a bad bend rams the bar though the high-tech inspection machine. They thus need to be inspected manually.
Being made of a magnetic material, these bars can be inspected using Magnetic Particle Inspection (MPI), but a typical magnetic yoke will only cover a small area. To inspect the four sides and four corners of a 9.14-meter (30-foot) bar requires many repetitive activations of the magnetic yoke, and a batch of bars would appear as a nearly endless task. Over the years, workers can develop strain-related injuries and need constant rotation.
The surface of these bars needed a new inspection solution.
The Solution
A custom eddy current array probe with 90-degree coverage designed to scan along the axis of the bars in a smooth continuous motion.
.png)
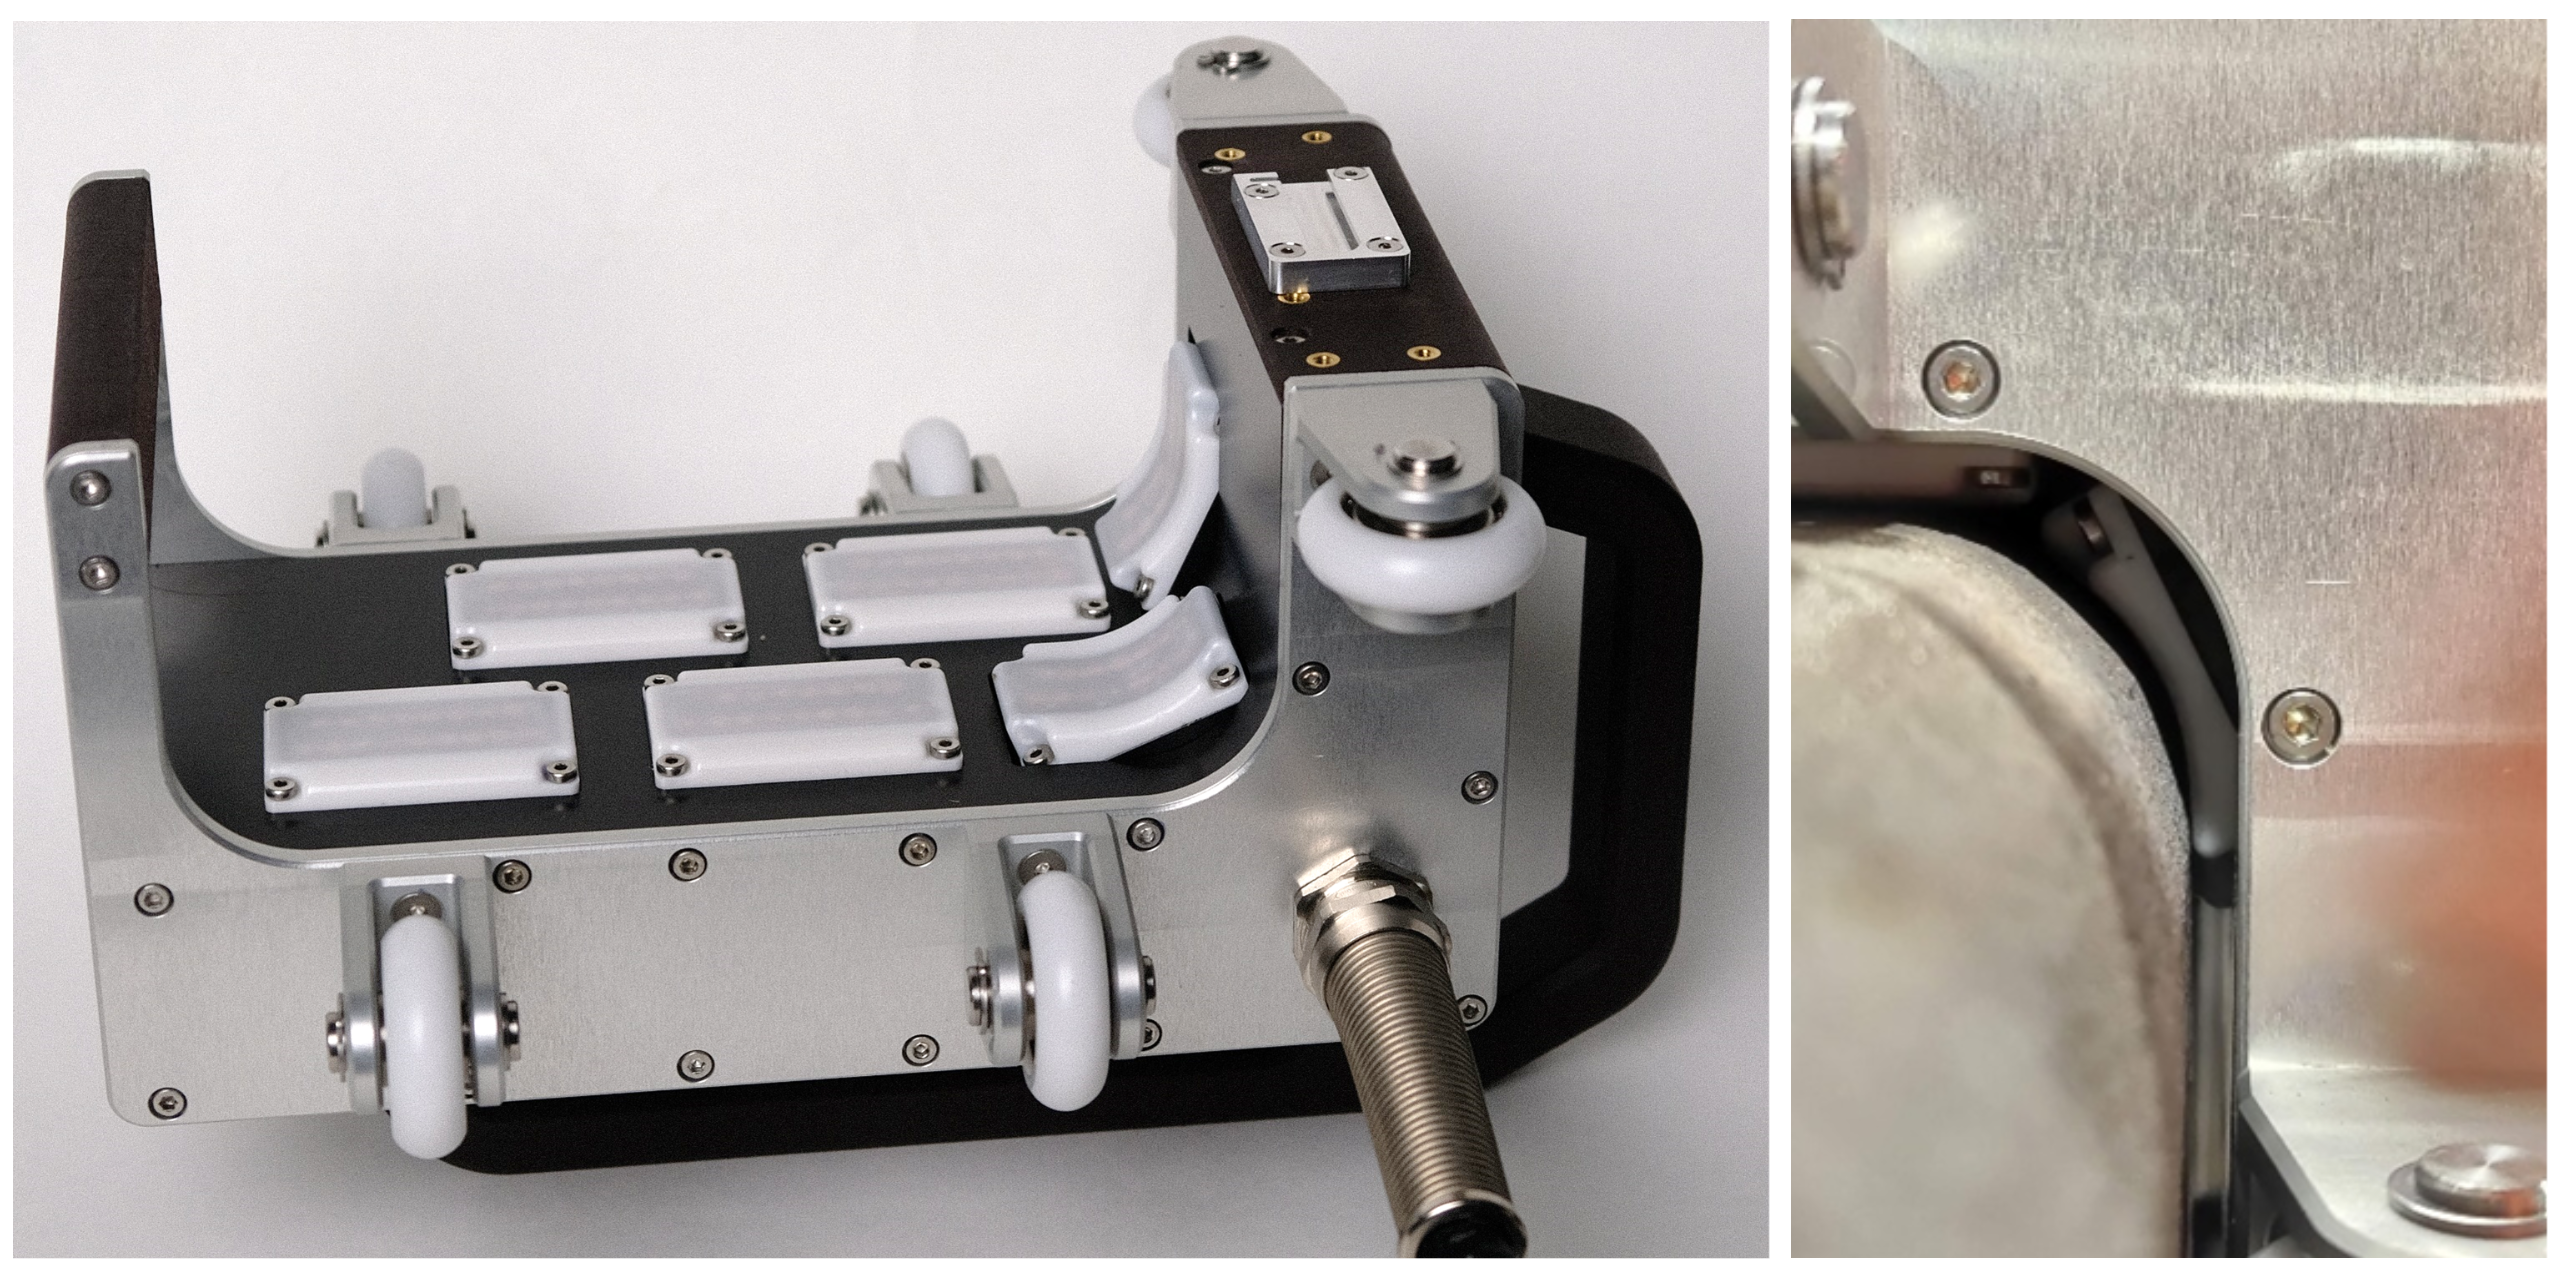
Figure 2: Customization of the eddy current array solution used in the Spyne probes.

Figure 3: Ceramic pads protect the coils from wear.
.png)
Figure 4: Reference sample with EDM notches compared to a screen capture of the same area. Notch D and G are 0.254 millimeters (0.010 inches) deep, which is shallower than the detection target. The system is tuned to ignore these shallow notches since they would be false positives, below the target depth.
To improve the situation, Eddyfi Technologies relies on years of experience in the deployment of Eddy Current Array (ECA) solutions in rough environments.
This custom probe repackages the successful inspection solution of the Spyne™ probe into a system specialized for round corner squares.
The probe uses an array of 96 coils with a diameter of 4.5 millimeters (0.77 inches) which provides full coverage of one face and one rounded corner per scan pass. Using long single-driver topology, it is sensitive to defects in any orientation. The probe can also be used with an encoder to record the exact position of the detected indications.
Considering the rough surface of the inspected material, the coils are protected by highly durable ceramics shoes. A special spring-loaded design and accurate machining allows the coils to keep close to the varying shape of the billet’s rounded corner.
Using C-scan imaging combined with high-accuracy impedance signals for confirmation, this ECA configuration can detect defects 6 millimeters (0.25 inches) long defects as shallow as 0.5 millimeters (0.020 inches) deep.
According to the client, “The Eddyfi Technologies team did an excellent job on this custom probe. It is in full production being used non-stop for 8 hours a day, 5 days a week with no issues. It is extremely accurate and built rugged enough to tolerate the daily abuse of a rough steel surface. Thanks to the fine folks at Eddyfi Technologies. By the way, we are using the Spyne on our round bars with the same excellent results!”
Ask an ExpertBenefits
- The customized solution provides a fast and simple-to-use system with visual cues to locate defects, reducing overall inspection times.
The developed solution makes it possible to quickly detect small surface-breaking and near-surface defects while being easy on the operator.
The ECA system designed by the team at Eddyfi Technologies makes it possible to detect all the defects that used to be found by MPI. The custom mechanical design ensures that the inspection is fast, simple, and robust. The probe’s ergonomic shape enables safe and efficient movement along billets, while consistently generating high-quality scans. Thanks to the Reddy® instrument, data is visualized in real time and operators can mark the location of defects on the billet as soon as they are displayed on the screen using the built-in data acquisition software, Magnifi®. Moreover, the digital aspect of eddy current data allows complete recording and archiving of the scans, which can prove tedious or simply unachievable with magnetic particle testing.
Compared to magnetic particle testing, Eddyfi Technologies streamlines the inspection process, saving both time and money while improving operator ergonomics, enhancing detection performance, and ensuring an efficient and reliable quality control while prioritizing operator longevity. Contact us today to learn more about how our cutting-edge technology can benefit your inspection program.


