Advanced Phased Array UT for Stainless Steel Weld Inspection
Ask an expertRecent progress in instrumentation and software has made the use of real-time full matrix capture and total focusing method available on most high-end phased array ultrasonic testing units. These techniques have been introduced in ASME codes and ISO standards. Dedicated training courses, as prescribed by the codes, are offered by large training centers. And in the world of non-destructive testing, we're on a quest to make inspections smoother than your favorite Instagram filter. Innovation is ongoing, and non-destructive testing equipment vendors are constantly working to make the inspection process as seamless as possible. The demand to make inspections easier to set up, and faster to perform, with improved data imaging quality for best informed decisions—especially when it comes to the unique factors presented with stainless steel and dissimilar metal weld inspections, is evident.
The Challenge
Overcome the challenges associated with inspecting complex materials like dissimilar metal welds including high attenuation, low resolution of law images and inadequate coverage.
Austenitic materials in stainless steel and dissimilar metal welds have an anisotropic coarse-grain structure, this results in a specific behavior of the ultrasonic beam when propagating through the material: high attenuation, high grain noise, redirection and distortion of the beam, and a low-pass filter effect blocking waves at higher frequency. All these phenomena finally result in very challenging conditions for phased array ultrasonic testing (PAUT) inspections.
In addition, dissimilar metal welds typically join two or more different materials, so multiple acoustic interfaces are present together with a sometimes very complex geometry, including nozzles and tapers.
For a lot of austenitic welds, standard phased array probe and wedge combinations will not provide the required inspection capability to achieve the desired results. Therefore, Eddyfi Technologies presents solutions to help improve detection and characterization of flaws.
The Solution
Advanced focusing techniques using well-selected DMA probes play a key role in the success of phased array ultrasonic testing inspection for austenitic materials and complex weld configurations.

Figure 1: Stainless steel reference block with simulated branched cracks (left). PWI/TFM with envelope (middle). FMC/TFM with envelope (right).

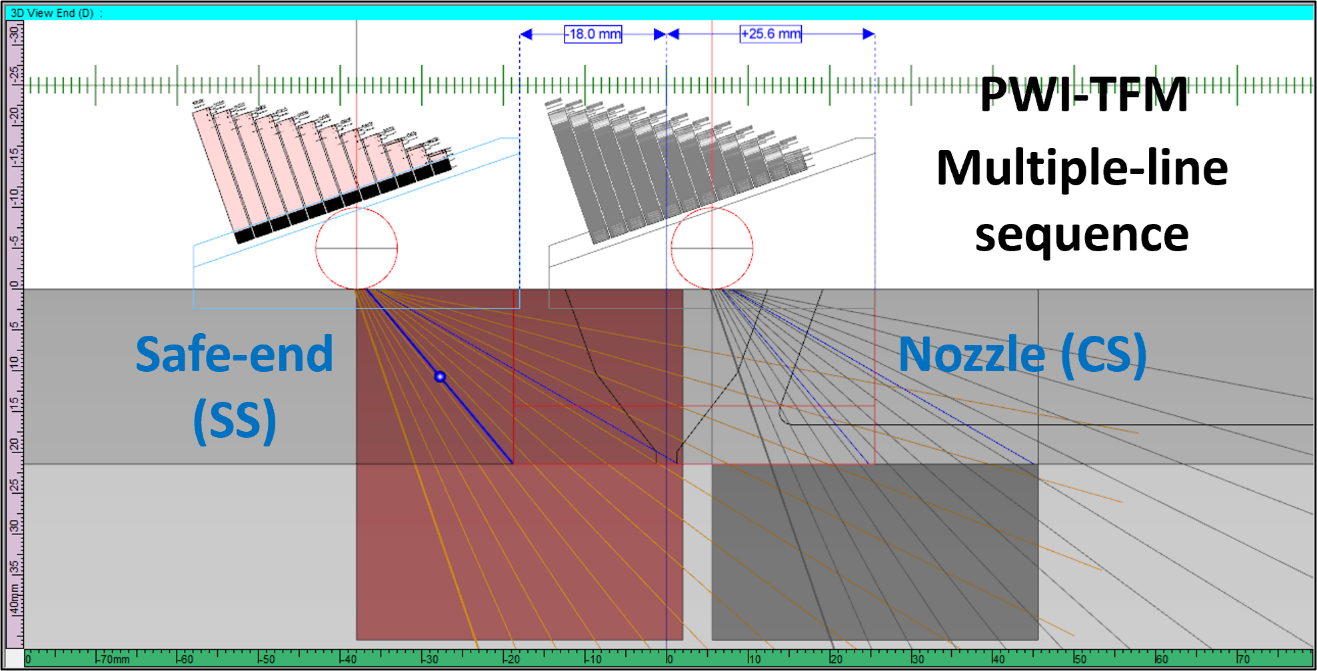
Figure 2: Scan plan in UltraVision for multiple-line scanning with PWI-TFM inspection technique looking for circumferential flaws in dissimilar metal welds.

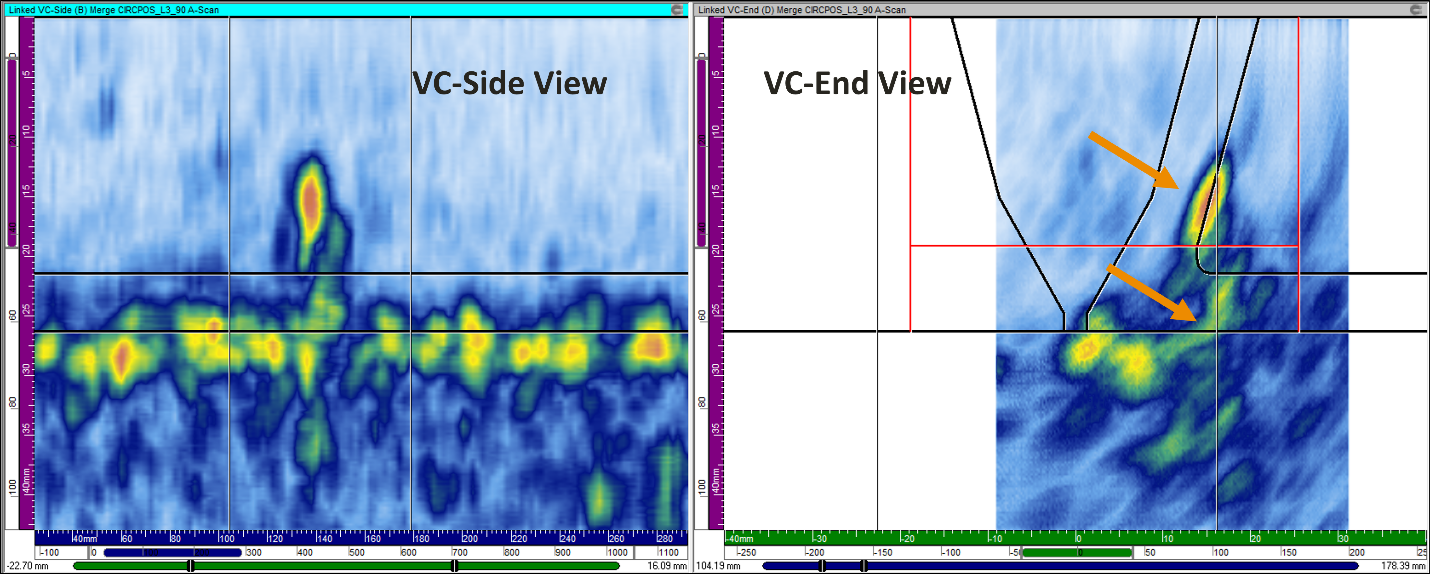
Figure 3: Image of thermal fatigue crack in dissimilar metal weld, detected with PWI-TFM technique using longitudinal waves from 1.5 mhz DMA probe assembly; tip and corner echoes can be resolved for sizing.
Full matrix capture (FMC) is a firing technique that consists of capturing and recording A-scan signals from every transmitter-receiver pair in an array. From the raw A-scan signals, it is then possible to generate ultrasonic testing imaging with advanced focusing techniques like the total focusing method (TFM), either live or through post-processing.
Plane wave imaging (PWI) is an alternative firing technique that uses a multi-element aperture for pulsing instead of firing each element individually like full matrix capture. Receiving is done individually with each element. The firing sequence typically consists of multiple focal laws, with varying angles and/or apertures. Just like full matrix capture, TFM imaging can be done live during inspection.
PWI data acquisition has several benefits when compared to FMC data recording. The emitted pulse from the full aperture has more energy and is more directional than a single element excitation. It provides greater sensitivity and better signal-to-noise ratio (SNR) at higher scanning speed because of a significantly shorter firing sequence. When looking at simulated branched cracks in stainless steel base material, you can see in Figure 1 that the multiple facets of the cracks are well resolved in the TFM images from both PWI and FMC firing. But the maximum acquisition rate for the PWI firing sequence is 2 times higher which allows 2 times faster inspection speeds.
Effective phased array inspection techniques for dissimilar metal welds are typically based on low-frequency (1.5 to 3.5 MHz) Dual 2D Matrix Array (DMA) probes. Such probes can be used to generate either shear waves for inspection of base material, or longitudinal waves for better propagation in through coarse-grain austenitic weld material and the successive acoustic interfaces. The dual transmit/receive configuration offers better sensitivity and SNR due to the “convolution” of transmitter and receiver beams and avoids “ghost echoes” caused by internal wedge reflections.
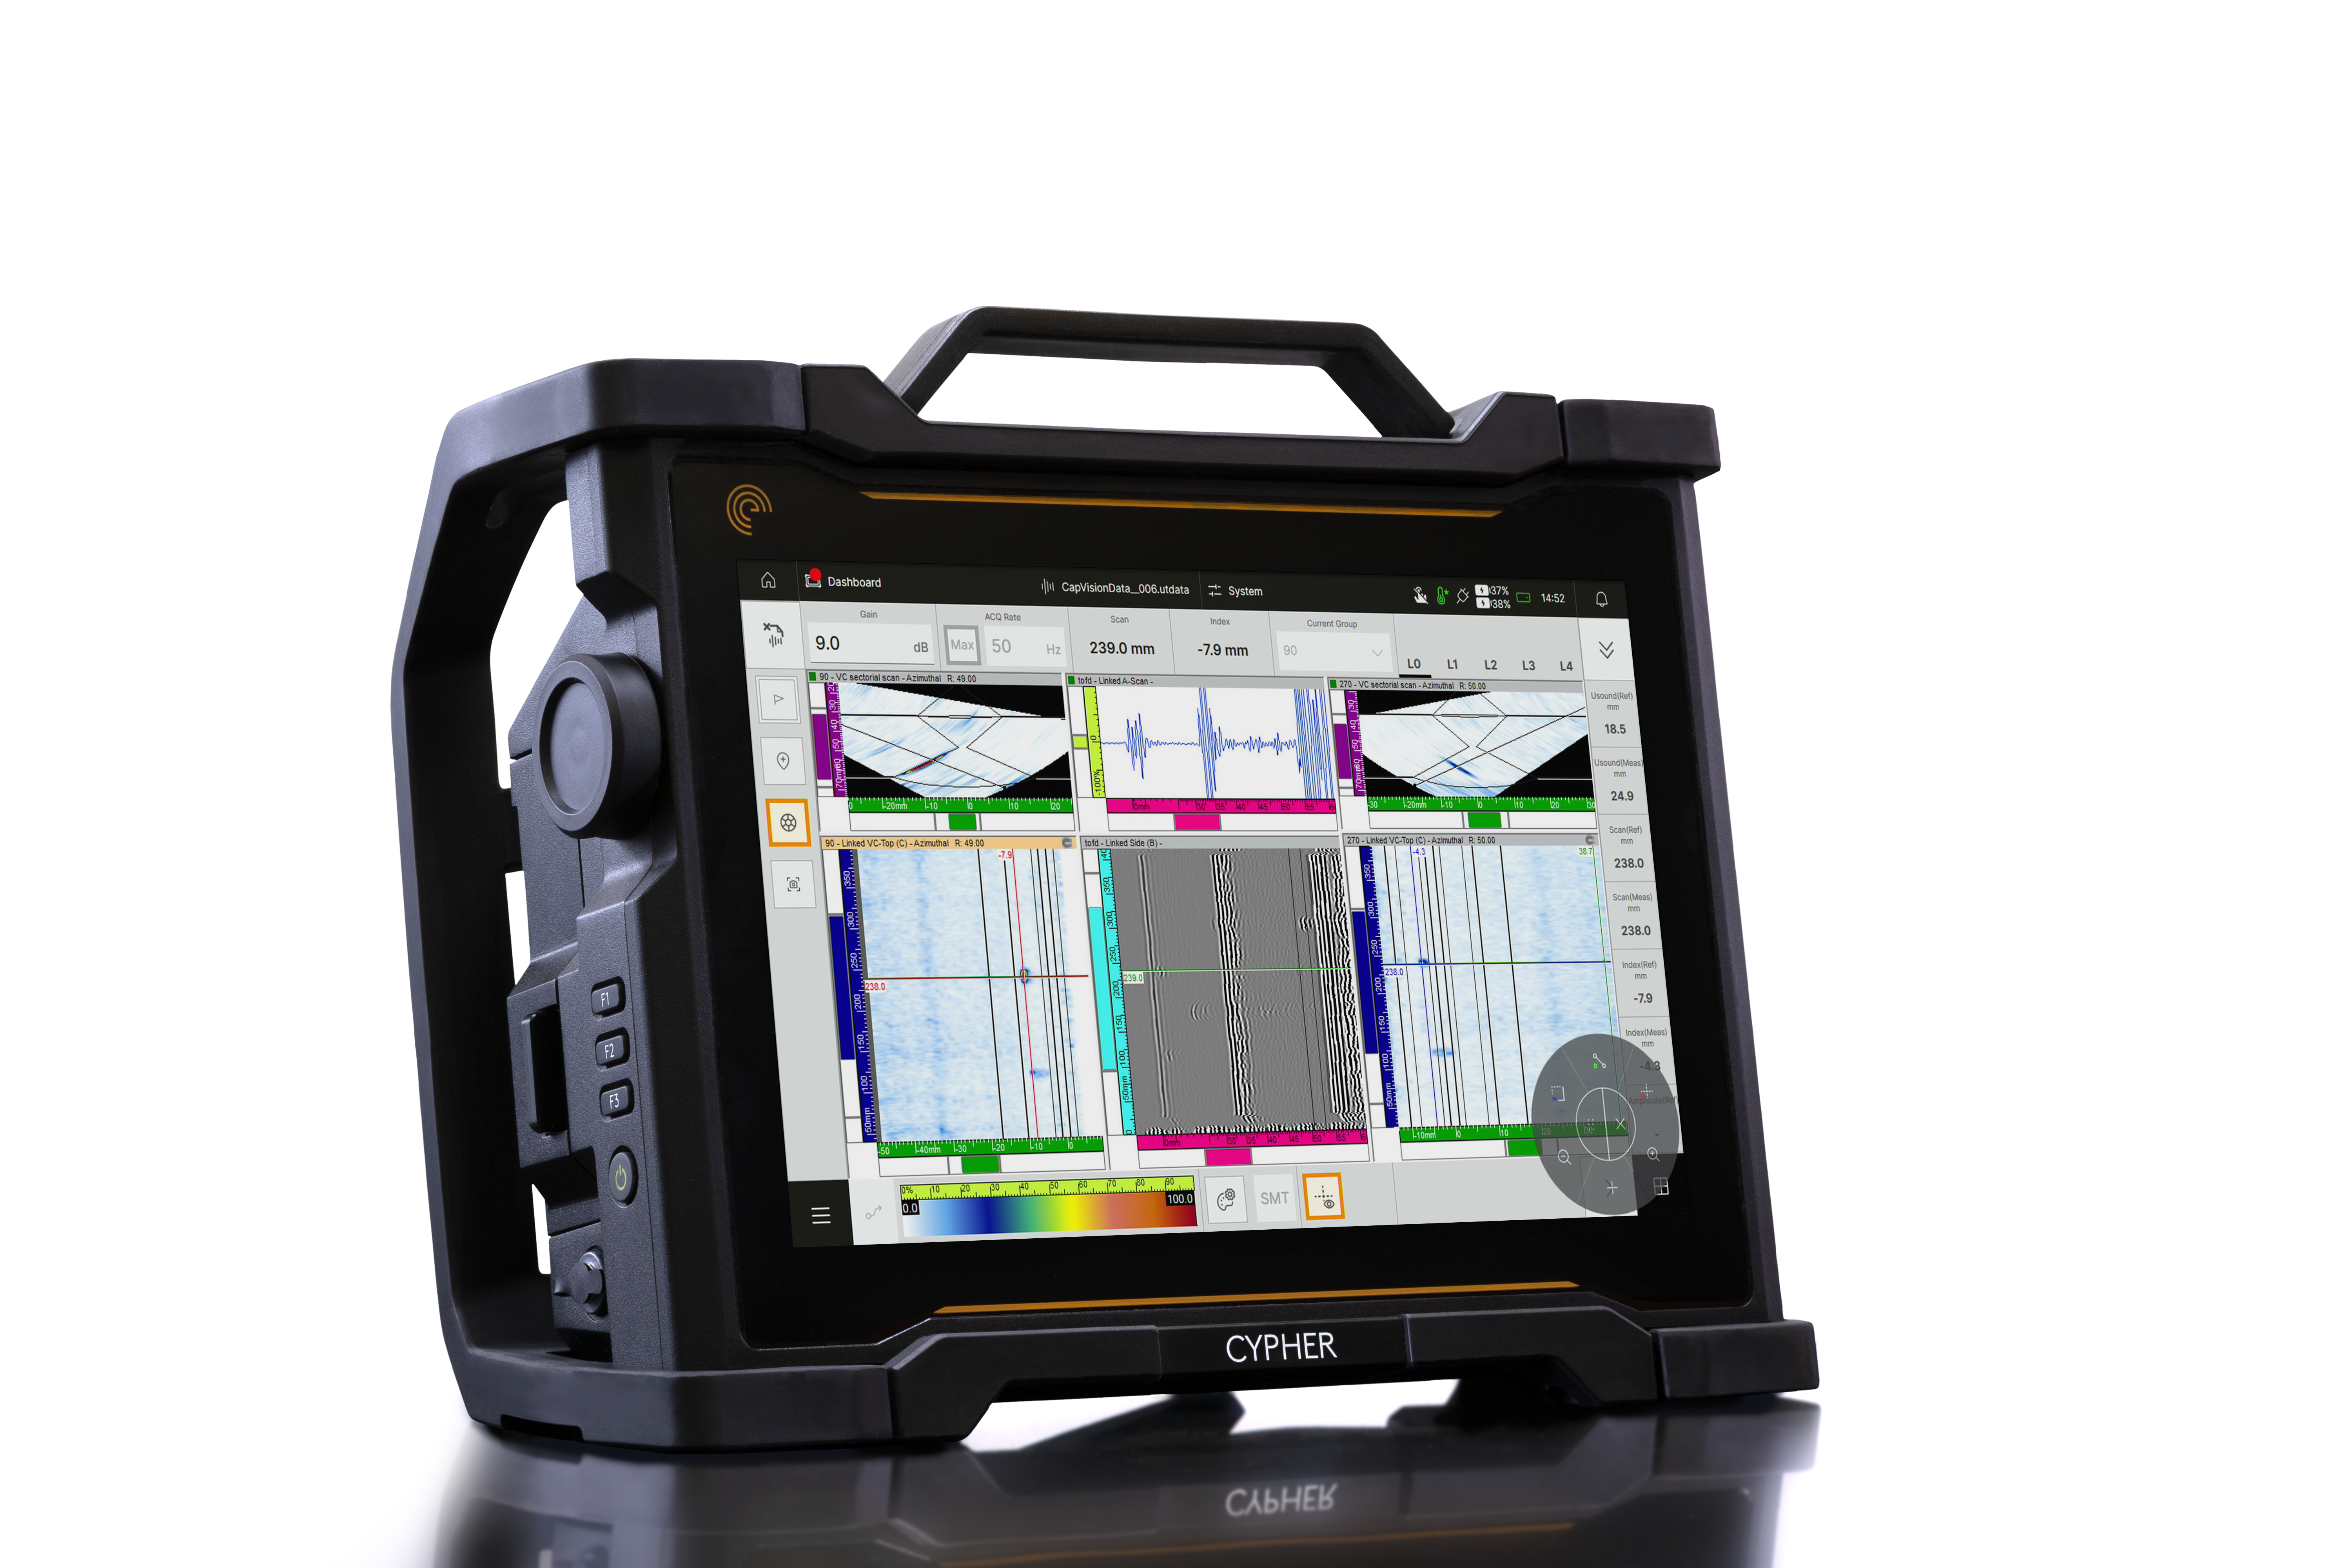
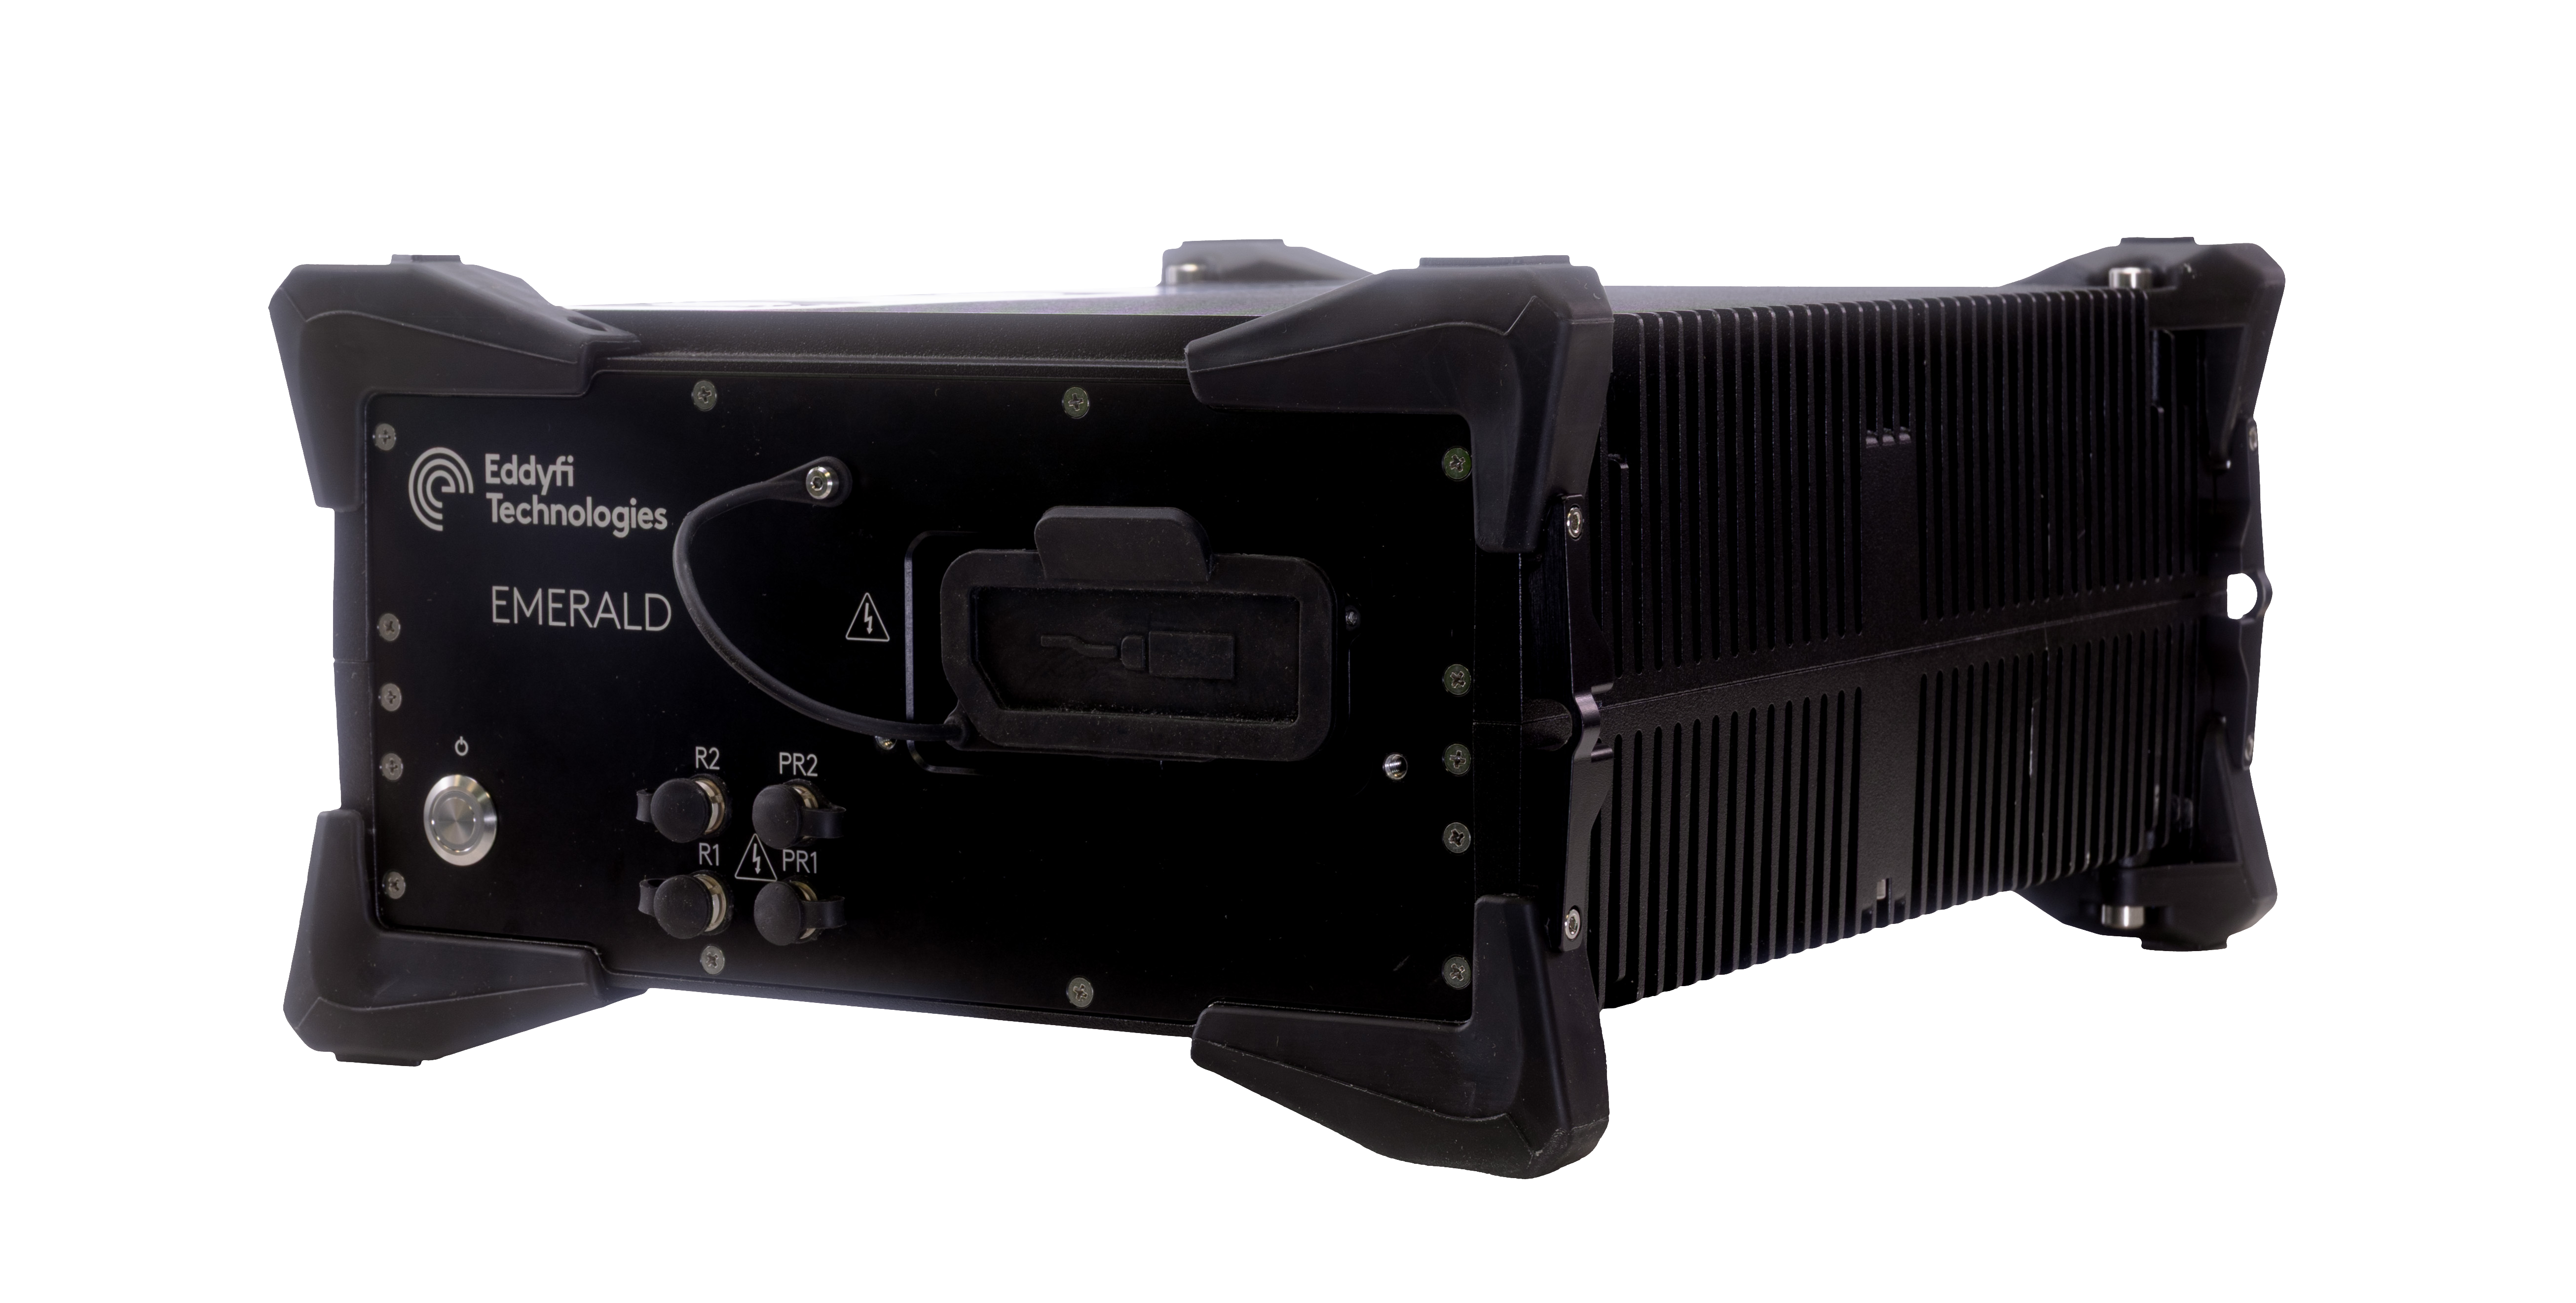
Figure 2 shows a scan plan in the UltraVision® software for inspection of a 25 millimeters (mm) thick dissimilar metal weld with a multiple-line scanning sequence with PWI firing and TFM imaging. A 1.5 MHz DMA probe is used with a wedge for longitudinal wave generation. When using the Eddyfi Technologies Cypher® or Emerald Instruments, a scanning speed more than 100 mm/s can be achieved for this inspection. The detection capability of the technique is clearly illustrated in Figure 3, showing the image of a real thermal fatigue crack in the interface between Inconel buttering carbon steel nozzle. High-energy PWI firing through the austenitic weld and buttering materials allows to clearly resolve the tip and corner signals of the crack in the TFM image.

Eddyfi Technologies Emerald is a compact phased array ultrasonic testing instrument that includes all the advanced methods discussed, delivers fast performance and intelligent results, and features exceptional signal quality meaning it can achieve high amplification without signal distortion. With real-time multi-total focusing method processing onboard and offline, combined with its FMC and PWI data acquisition features, the Emerald phased array system can produce faster and more detailed inspection results than most instruments on the market. Given its advanced capabilities, it is the ideal solution for addressing stainless steel and dissimilar metal weld inspections.
See pricing
Benefits
- Improved detection and flaw characterization, increased inspection coverage, speed, and data quality for better informed decisions.
Advanced focusing techniques allow for the inspection of more complex configurations in a variety of industrial environments. PWI offers improved resolution and inspection coverage and increases the inspection speed compared to both FMC firing and standard PAUT. This allows inspectors to save time and increase productivity—all while maintaining the same high-resolution images expected from total focusing method.
Selection of appropriate probes, in terms of frequency and wave mode, remains a key requirement for success, especially for stainless steel and dissimilar metal welds. Very often, low-frequency DMA probes will be required for these inspections. Learn more about these inspection techniques at the Eddyfi Academy or contact our experts and discover how this solution can help you focus your efforts on what matters most!


