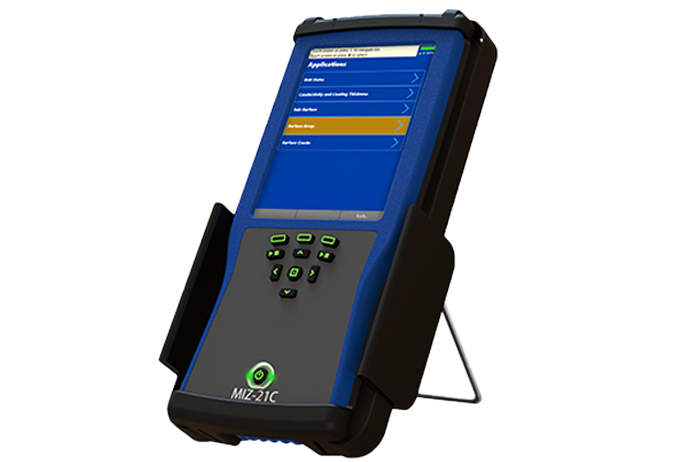
Introducing MIZ®-21C, the most advanced handheld instrument with surface array capabilities. The truly affordable MIZ-21C is ideal for aerospace applications. Its ergonomic design, long battery life and intuitive touchscreen enable the user to inspect more areas faster than ever without fatigue. With features that include depth sizing, fully sealed unit, excellent operating temperature range, up to 10 hours of battery life, large internal storage capacity and more, MIZ-21C maximizes inspection efficiency and value.
Download MIZ-21C SoftwareFeatures
Surface Array In A Handheld Instrument
Increase Uptime, Wherever You Go
Ergonomic Design
Intuitive Touchscreen
Field Ready
Highly Versatile
Flexible Connectivity
Universal Symbol Buttons & Multi-Language Software
Details
Save time and money
MIZ-21C is a fast, highly portable and cost-effective replacement for Liquid Penetrant Testing (PT) and Magnetic Particle Testing (MT) inspections. The surface array option can reduce inspection time by up to 95% versus pencil probes.
MIZ-21C’s intuitive touchscreen and simple, yet powerful embedded software gets users inspecting in no time, offering quick set-up and hassle-free operation.
Request a quoteInspect more areas
The MIZ-21C is designed for user comfort. Its low weight of 1.2 kg (2.6 lbs) makes it ideal for one hand operation. The small form factor enables users to carry the MIZ-21C in any inspection environment, enabling the portability of surface eddy currents to a level never reached before.
Improve flaw detection
MIZ-21C features an industry-leading signal quality for an improved flaw detection capability. When coupled with surface array, users can be confident that MIZ-21C will deliver the most thorough inspection in its class.
Designed for a wide range of applications
MIZ-21C delivers an inspection advantage across numerous inspection applications including:
Depth Sizing for Cracks or Corrosion.
Depth sizing is a critical need in many inspection industries to determine crack depth, the extent of corrosion penetration, or other types of flaw sizing. The MIZ-21C uses depth curves that are established through a calibration process from a standard with known indications. These indications are representative of the flaws that are to be detected. Depth sizing can be done with conventional probes or Surf-X Array probes. Near Surface or Far Surface (ID vs OD) must be defined due to different response. When creating the depth curves, they can be defined by amplitude volts or phase angle and many types of best fit curves are available to select from to give the best results.
Multi-Layer Corrosion Inspection.
Identifying corrosion is one of the most critical and complex aspects of airframe inspections. Changes in skin thickness as well as varying multi-layer structures usually make it difficult to recognize signals. The MIZ-21C has the power to penetrate thick sections. Exceptional signal-to-noise ratio helps inspectors distinguish even a small loss of material. Dual-frequency with mixing nearly eliminates the unwanted signals caused by varying air gaps between layers that can “mask” the signal of interest.
Detecting Cracks Near Fastener Holes.
Pencil probes are an option for detecting small cracks in close proximity to fastener holes. The inspector uses a known crack or notch standard to set up the MIZ-21C signal display. Then, while scanning the test piece, the inspector can estimate the depth and length of surface cracks by comparing the phase and amplitude of the generated eddy current signal to the standard’s signal. A fast, simple option is to use the available surface array capabilities of the MIZ-21C instrument and Surf-X Array probe. This approach can simplify the inspection and complete it in a fraction of the time compared to more traditional methods.
Conductivity and Coating Thickness Measurement.
Use digital conductivity measurements (resistivity) to characterize/sort materials. Directly measure the conductivity of metals and alloys, such as aluminum structures, using dedicated conductivity probes that have a broad operating frequency range. Or measure a nonconductive coating such as paint. The MIZ-21C offers a wide measurement range for both conductivity and thickness.
Available in Three Models
| Feature | MIZ-21C-SF | MIZ-21C-DF | MIZ-21C-ARRAY |
| Conductivity | |||
| Single Frequency | |||
| Dual Frequency | |||
| Rotating Scanner | |||
| Eddy Current Array |

Specifications
267 × 122 × 38 mm (10.5 × 4.8 × 1.5 in)
1.2 kg (2.6 lb)
5.7 in (480 x 640 pixels)
Up to 10 hours
18-Pin Lemo
26-Pin Lemo
USB 2.0, Wi-Fi, Bluetooth
2 axes, Quadrature, Only 1 axis is currently available for surface array applications
Automatic with Zetec ID Chip
MIZ-21C-SF: 1, MIZ-21C: 1, MIZ-21C-ARRAY: 3
MIZ-21C-SF: 1, MIZ-21C: 2, MIZ-21C-ARRAY: 2
MIZ-21C-SF: 32, MIZ-21C: 64, MIZ-21C-ARRAY: 192
MIZ-21C-SF: 2, MIZ-21C: 2, MIZ-21C-ARRAY: 32
5 Hz to 10 MHz
Up to 12 Vpp (19 Vpp for ECA) in 0.1 Volt increments
Continuous and Super-Multiplex
10 to 173 dB
16 bits
50 Ohm
Median, High Pass, Low Pass, High Pass 2 (Adjustable CC), Bandpass, Spike, SNR
Adjustable Box, Sector, and Polar, Audio adjustable volume, Headphone support
60, 120, 240 and 480 kHz
Digital readout in 0.9 to 110 %IACS (0.5 to 70 MS/m), Accuracy within ±0.5% IACS from 0.9% to 65% IACS and within ±1.0% of values over 65%
Can measure non-conductive coating thickness from 0 mm (0 mil) to 2.032 mm (80 mil). Accuracy of 0.025 mm (±0.001 in.) over a 0 mm to 0.64 mm range
MIZ-21C-SF: No, MIZ-21C: Yes, MIZ-21C-ARRAY: Yes Zetec Rotating Scanner, Others
60 s or 10 meters
English, Spanish, French, German, Chinese, Japanese, Portuguese, Russian
128 GB
Compliant with ISO/IEC 17025:2005, Meets or exceeds manufacturer's requirements
100 to 240 VAC, Auto-Switching
50 to 60 Hz
15 VDC
40 W
-10°C to 50°C (14°F to 122°F)
-20°C to 70°C (-4°F to 158°F) (w/out batteries)
95% non-condensing


