Inspecting Laser Welds in Component Manufacturing
Welding techniques are numerous and each of them has its peculiarities. Laser Beam Welding (LBW) uses a laser to concentrate heat, very quickly producing deep, narrow welds. Laser welding is common in nuclear applications and high-volume applications such as automotive component manufacturing, as well as others where speed and excellent accuracy are necessary.
The Challenge
- Detecting and locating defects in laser welds more accurately and faster than with conventional inspection techniques (UT, RT, ECT).
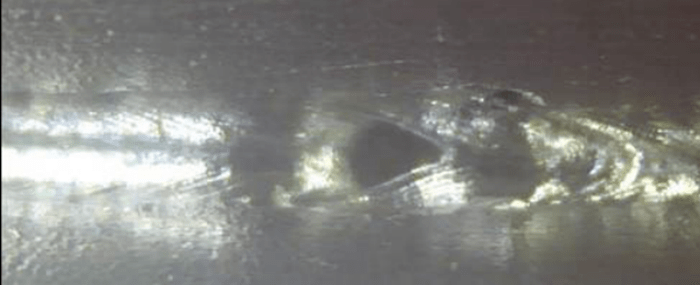
Despite the many advantages of LBW, it is not without disadvantages. Porosity in welds is one of them. Porosity sometimes results from instability during partial-penetration, high-power LBW. Since this type of welding is shielded with an inert gas, porosity can result when the gas shielding is inadequate (improper flow rate). Porosity can also be a particular problem for laser welds on aluminium because hydrogen pockets can develop in the weld metal.
Further, travel speed is a critical concern in LBW. Because the laser’s heat is highly concentrated, there is always a risk of puncturing the welding spot if the laser travels too slowly. When this happens, tiny through-holes remain that affect the integrity of the welded structure. Such holes are typically 0.25 mm (0.01 in) in diameter.
The high-cooling rate of laser welds is, likewise, a source of problems as it can produce solidification cracking, especially in high-carbon steel, which also compromises integrity. Solidification cracks can appear in several locations and orientations, but are most commonly longitudinal, subsurface, or surface breaking.
Inspecting laser welds with Eddy Current Testing (ECT) pencil probes is very operator dependant, therefore rather slow and Inspecting Laser Welds in Component Manufacturing of varying quality. Radiographic Testing (RT), common in inspecting such welds, is time consuming because it requires specialized personnel/ equipment and retreating the regular personnel to safe locations during inspection. Ultrasonic Testing (UT), similarly common, requires couplant and is virtually blind to shallow surface-breaking defects.
LBW also sometimes involves simultaneously inspecting numerous welds (such as is the case here), which generates an impressive amount of data. Helping analysts identify potential problems automatically will therefore be within the scope of the solution.

The Solution
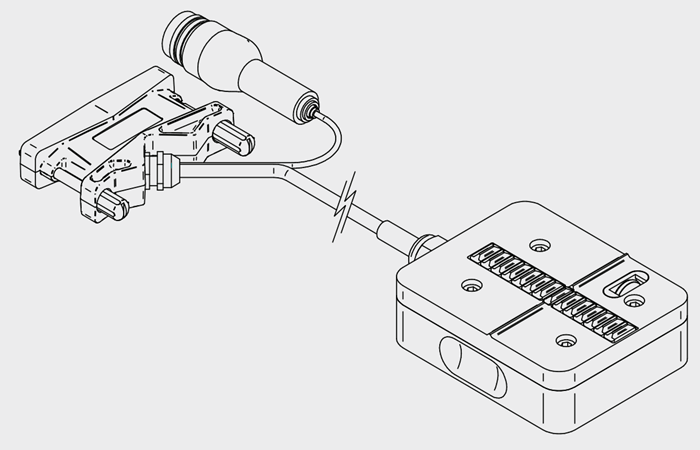
- A custom ECA probe with an integrated encoder and a powerful processing/analysis package.
Eddy current has a long track record of being able to detect the types of defects found in this application. Eddy Current Array (ECA) technology enhances the capabilities of eddy current by using several coils in a single probe in a cooperative sequence aimed at preventing mutual interference. The sequence can provide a wide and complete scan of the surface under test. The coils are designed to have the necessary impedance and penetration to inspect the target material accurately.
The ECA probe designed for this application hugs the surface under test. Two coils are ingeniously positioned on each weld to detect flaws at their roots. The current application called for 20, something that had never been done before.
The probe integrates an encoder, which decreases the influence of speed on the inspection. The encoder makes defect positioning significantly easier. It also allows using more advanced filters on the recorded inspection data than would be possible with other inspection technologies.

The Ectane® drives the probe.
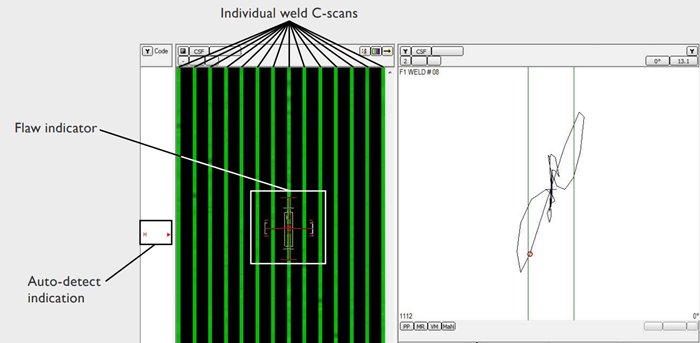
This type of application is mainly concerned with identifying and positioning defects. Magnifi®, our powerful acquisition and analysis software, displays scan data as easy-to-read C-scans. The software displays clear indications of defects and the probe’s encoder supplies the spatial positioning information necessary for analysts to locate defects in the parts under test. Because this probe is designed to scan several parallel welds, the C-scans are displayed side-by-side in Magnifi.
The software integrates an assisted analysis feature that automatically marks defects. This prevents analysts from having to sift through mountains of data looking for defects. They simply look for indicators.

Benefits
- Wider coverage, faster, and more accurate scans that can easily be analyzed with automatic detection features, and archived.
The solution offers several benefits over ECT, RT, and UT:
Shaped to specific laser-weld profiles
Rapid, stable, simultaneous scan of multiple welds
Easy to handle—no need for expensive robotic solutions
On-the-fly assisted analysis
Easier analysis with C-scan imaging
Fully computerized data recording and archiving capabilities
Beyond laser welds, ECA is good for a rainbow of other applications from tubes, bars, and threads that must be inspected quickly and efficiently. These applications also involve designing custom probes to fulfill highly specific requirements. Over the years, Eddyfi Technologies has gained a wealth of concrete experience developing eddy current array probes for these applications. By partnering with us for your project, you’re not starting from scratch. Rather, you have a great head start.


