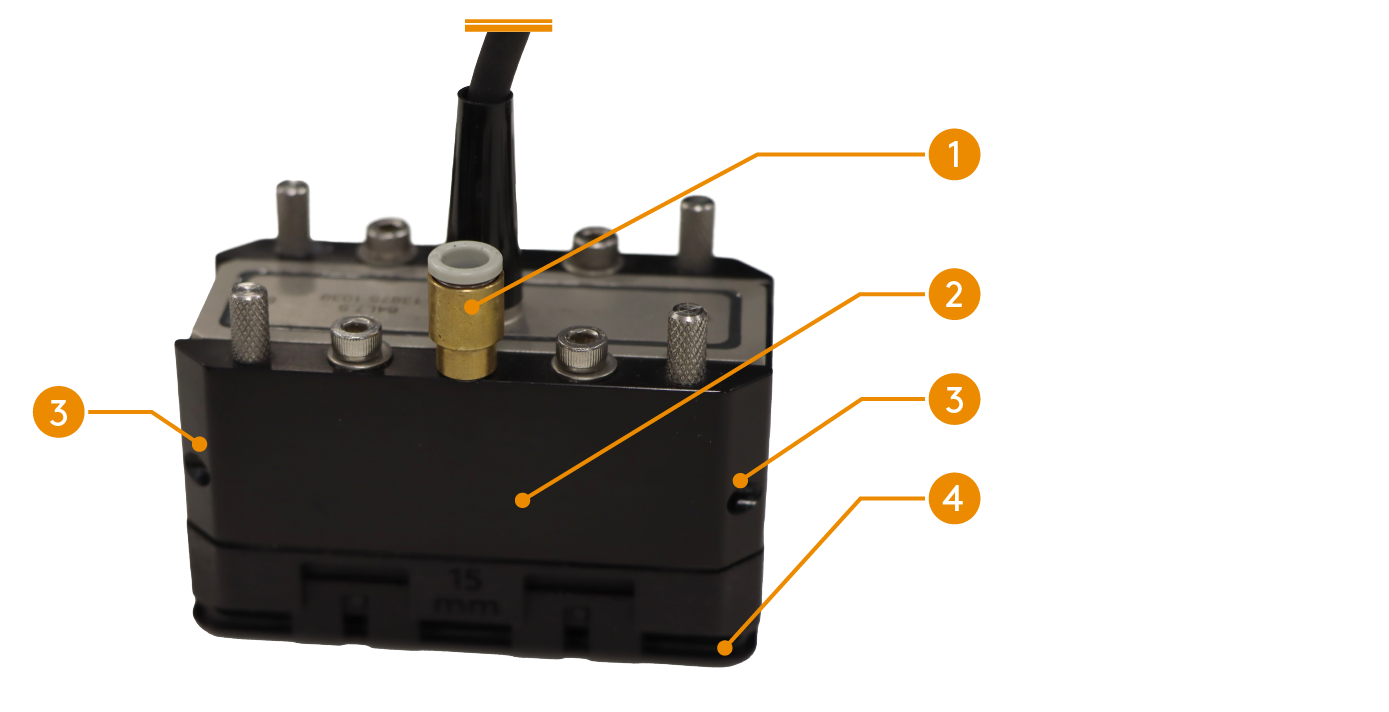
Eddyfi Technologies offers an advanced modular ultrasonic scanner for comprehensive Phased Array Ultrasonic Testing (PAUT) corrosion mapping, Total Focusing Method (TFM), Time-of-Flight Diffraction (TOFD) weld integrity assessment, flange joint inspection, and corrosion under pipe support (CUPS) inspections. Designed to meet diverse inspection needs, the scanner’s modular build allows for precise and reliable data collection across various applications, enhancing accuracy and minimizing downtime in challenging environments.
Details
Our UT scanner solutions are engineered for precision, productivity, and adaptability in applications such as:
- Corrosion Mapping View Brochure
- High Temperature Hydrogen Attack Detection View Brochure
- Boiler Tube and Small Diameter Pipe Weld Inspection View Brochure
- Austenitic Stainless Steel Weld Inspection View Brochure
- Carbon Steel Plate and Pipe Weld Inspection View Brochure
- Wet Hydrogen Sulfide Damage Assessment View Brochure
- Train Axle Inspection View Brochure
Explore Scanners by Application
We’ve made it easy to find the right scanner for your specific inspection needs.
- Boiler Tube and Small-Bore Weld Inspection
- Carbon Steel XY Corrosion Mapping
- Carbon Steel Weld Inspection
- Non-Ferrous Weld Inspection
- High Temperature Weld Inspection
- Flange Face Corrosion Inspection
- Nozzle Inspection
- Entry Level Inspection
If your application isn’t listed, contact our team for personalized assistance.
Semi-Automated Boiler Tube and Small-Bore Weld Inspection
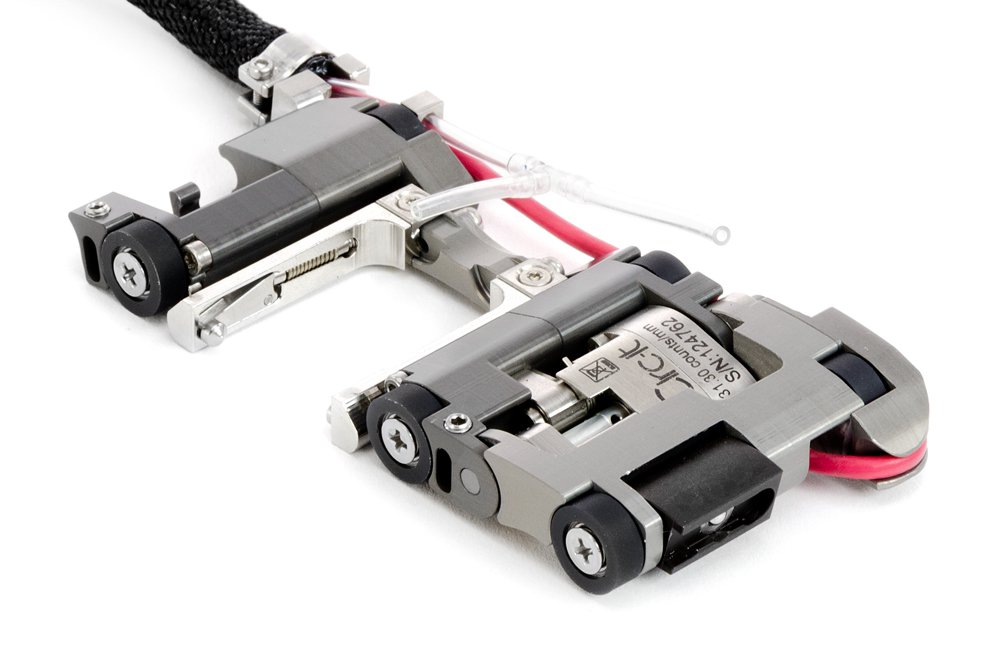
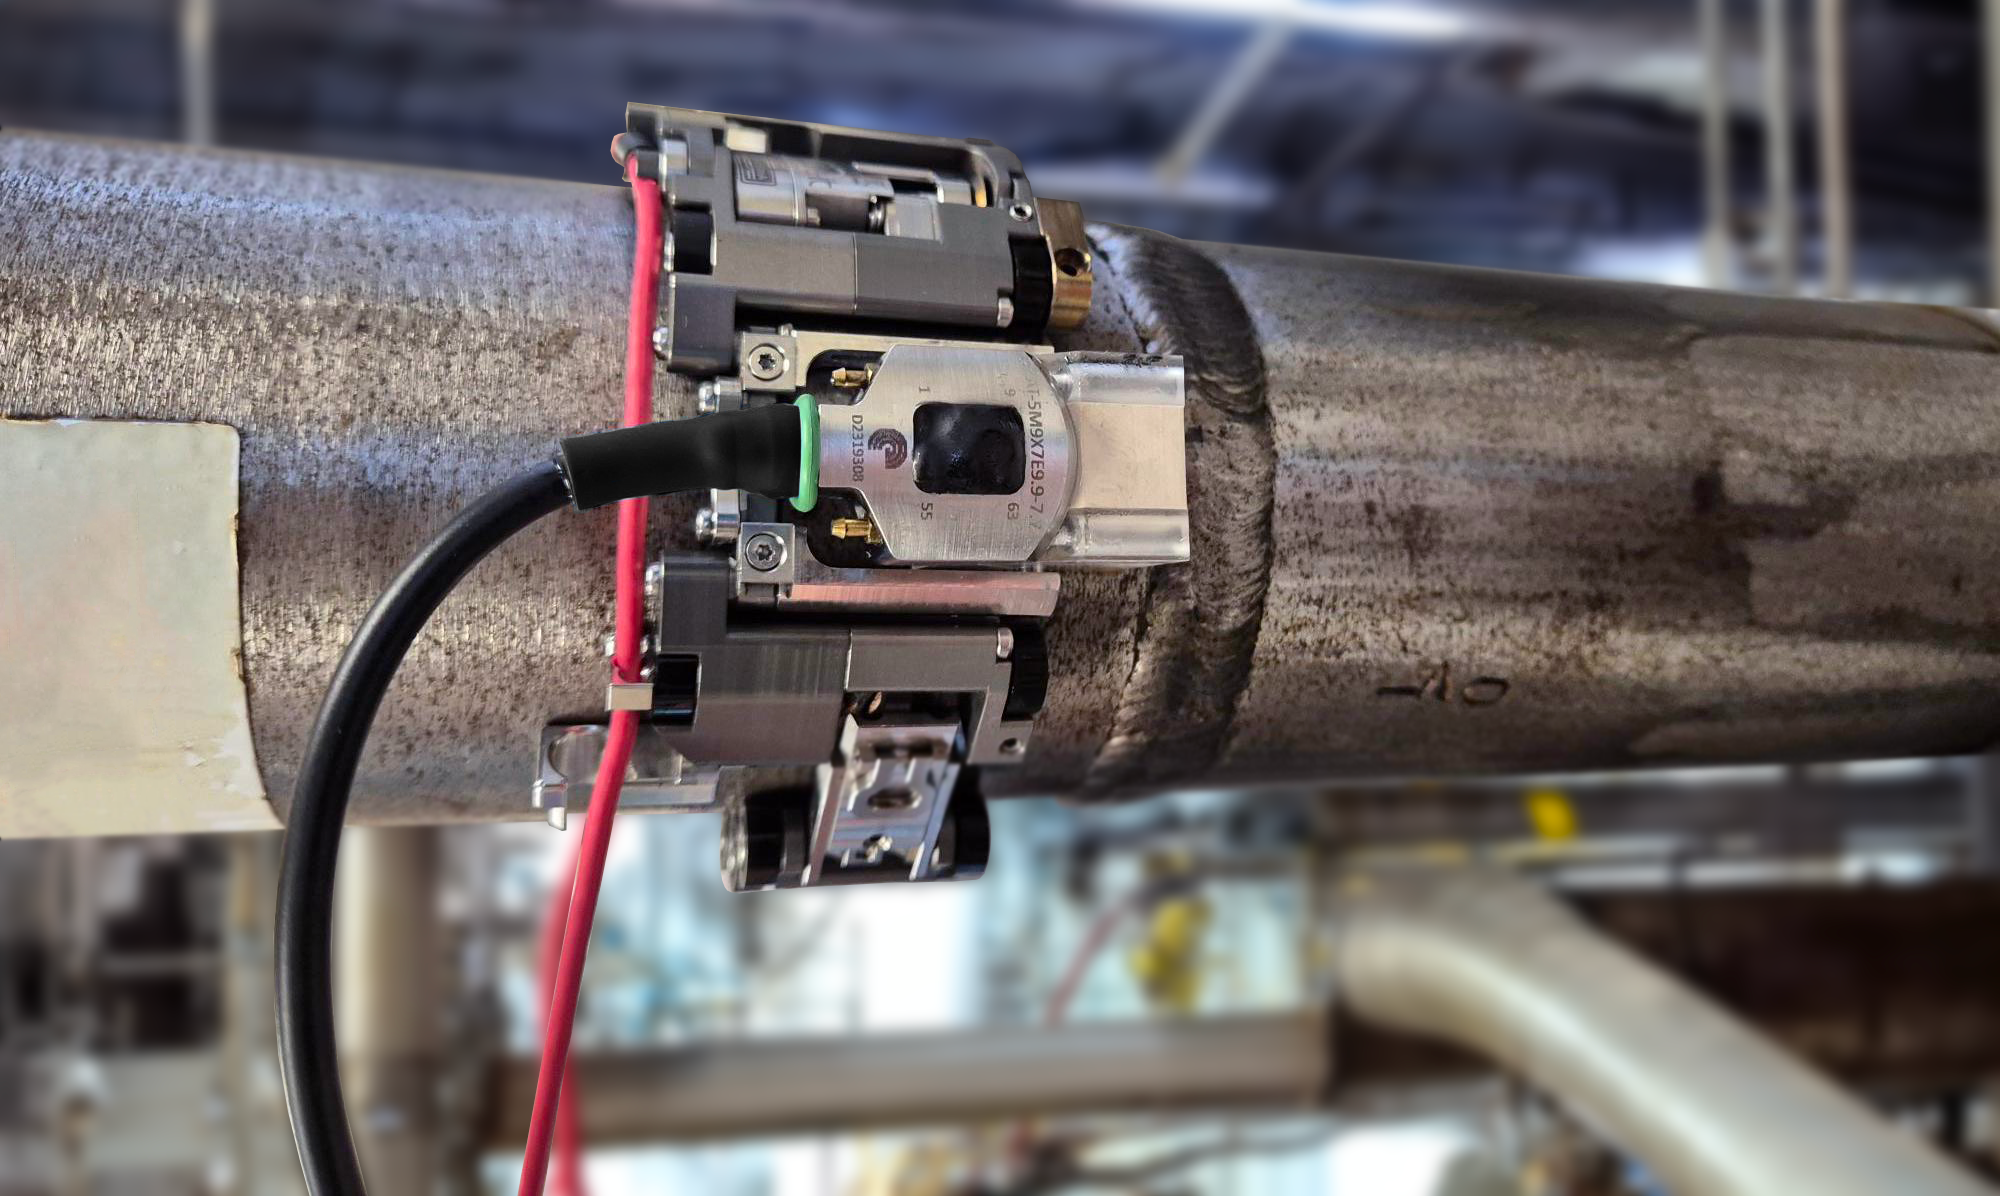
Effortlessly inspect the welds of small-diameter pipes with an industry-leading, low-profile weld scanner. Designed for high-precision, encoded probe positioning, this scanner is optimized for minimal clearance, operating within an 11 millimeter (mm) or 0.43 inch (in) radial envelope on pipes and tubes as small as 21.4mm (0.84in).
When paired with Eddyfi Technologies' advanced phased array instruments, the scanner delivers fast, efficient inspections on small-diameter pipes, even in areas with restricted access. The ultra-low profile, combined with A15 probes, ensures accurate scans on pipes up to 114.3mm (4.5in) while avoiding interference from adjacent obstructions. Its adaptable design, featuring modular links, quickly adjusts to various diameters, providing consistent probe pressure for reliable ultrasonic signals—even in challenging, limited-access environments.
Learn more about the advanced kit here.
Key Features:
- Ultra-Low Profile: Requires only 11mm (0.43in) radial clearance (scanner only, excluding transducers and wedges), making it ideal for tight inspection spaces.
- Small-Diameter Scanning: Capable of inspecting pipe and tube diameters as small as 21.4mm (0.84in), with encoder cable guard removal necessary for diameters below 31.75mm (1.25in).
- Single or Dual Probe Configuration: Carry two probes when needed or reduce the scanner width for single-probe applications.
- Adjustable Links: Easily adjust to scan pipes or tubes between 21.4 and 114.3mm (0.84 to 4.5in) with the intuitive snap-together link system.
- Durable Urethane Wheels: Provide smooth motion and secure traction, especially during vertical scanning.
Semi-Automated Carbon Steel XY Corrosion Mapping
For covering larger areas, a lightweight fixed-frame XY scanner is often the ideal choice. This versatile tool offers a range of deployment options, such as the Aquablock waterbox for localized immersion corrosion mapping, linear array probes with 0L wedge, and dual linear array probes. Its exceptionally low profile and lightweight design make it highly suitable for rope access applications, and it is particularly well-suited for vessel and pipework inspections.
Key Features:
- 750mm (29.5in) frame bar with ruler
- Dual encoder - scan and index axis
- Suitable for complete mapping of large surfaces
- Lightweight
- Accurate XY position

Semi-Automated Carbon Steel Weld Inspection
Circumferential Scanning
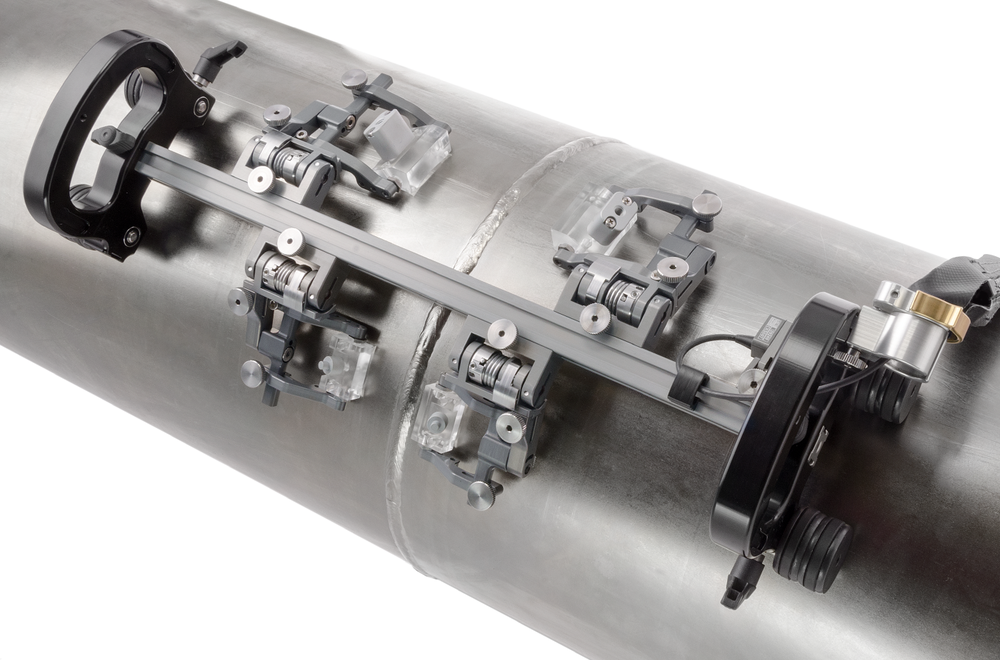
This versatile magnetic scanner is engineered for weld inspections on ferrous materials. It can accommodate up to four Phased Array (PA) and/or TOFD probes, making it an ideal solution for a wide range of weld inspection configurations. The highly adjustable tool posts ensure precise probe placement, while the spring-loaded design minimizes adjustments between scan setups, offering optimal performance across various weld types.
- Fabrication and in-service circumferential welds from 100mm (4in) to flat plate
- Pressure vessel circumferential welds
- Pipe to elbow/feature welds
- Storage tank/silo welds
- Crack detection, sizing & monitoring
- Corrosion/erosion detection & sizing
- High temperature inspection up to 350°C (660°F) version available
Long Seam Scanning
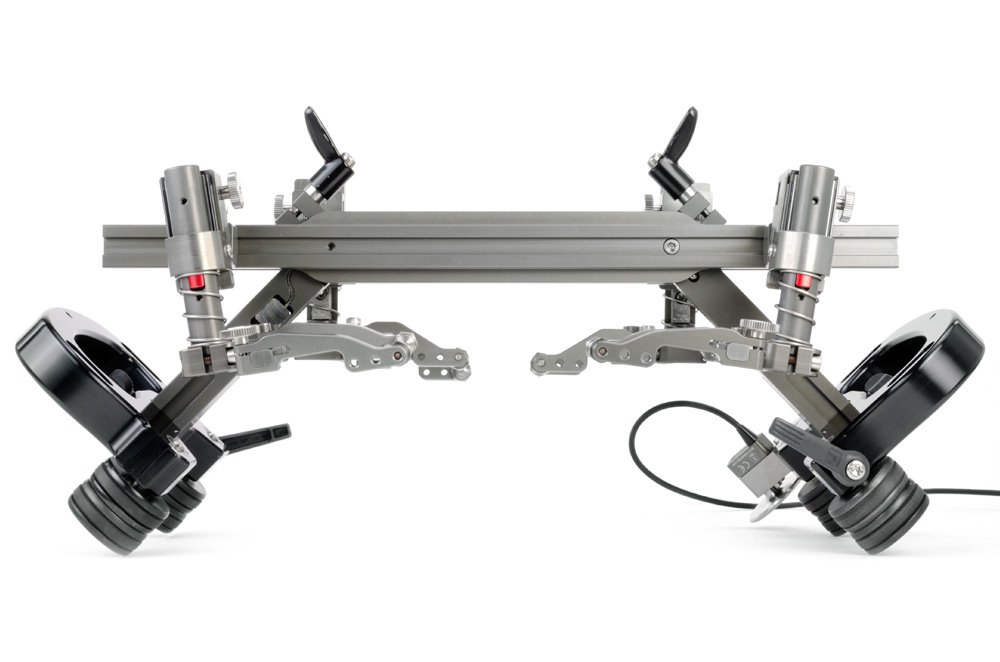
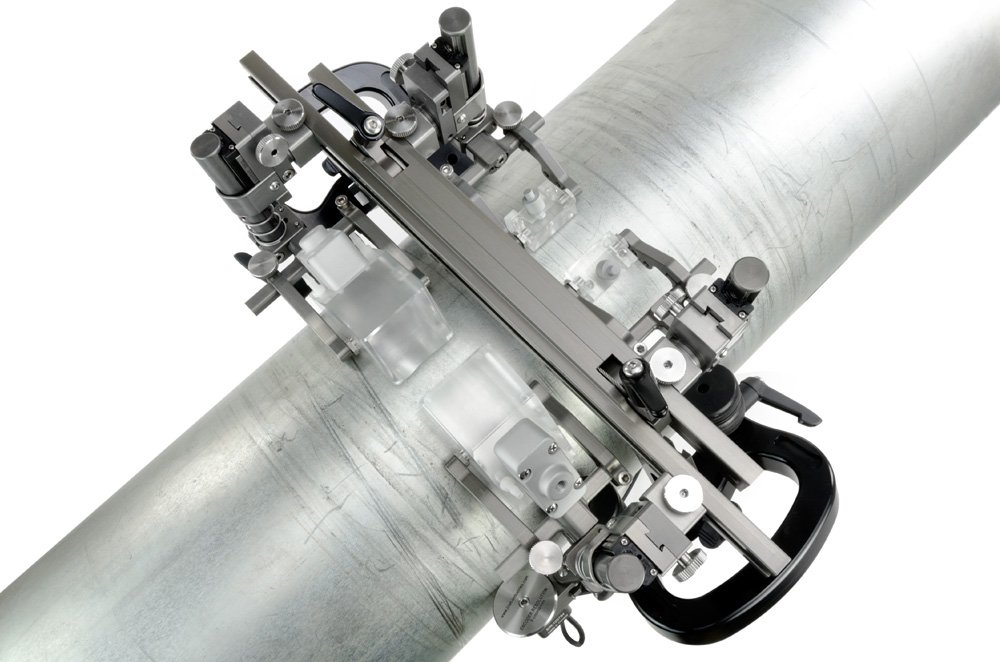
When longitudinal weld inspection is required, the innovative long seam system meets these needs with ease. Capable of handling both long and circumferential welds, this scanner is perfect for inspecting seam welds on excavations, Electric Resistance Welds (ERW), and more. The four-probe longitudinal weld seam scanner features a pivoting frame bar, allowing manual axial scanning on pipes as small as 15.2cm (6in). Its dual functionality and easy conversion between longitudinal and circumferential scanning make it an indispensable tool for efficient and accurate weld inspections. Note that the standard tool post arms supplied allows for a minimum wedge width of 17.1mm (0.7in) and maximum wedge width of 57.6mm (2.3in); a range of alternative tool post arms is available.
Key Features:
- Axial Scanning: The dual pivot frame bar enables longitudinal scans with two probes. Perform manual scans on pipes as small as 15.24cm (6in).
- Circumferential Scanning: Easily switch between circumferential and longitudinal modes. Scan circumferentially on pipes as small as 25.4cm (10in), or as small as 10.2cm (4in) with optional slip-joint probe holders (sold separately).
- User-Friendly Design: Comfortable handles ensure excellent control and provide mounting points for accessories.
- Spring-Loaded Encoder: Maintains constant surface contact for precise scanner positioning.
- Phased Array and TOFD Probe Holders: Multiple setup configurations and fine-tuned adjustment options allow for flexible probe placement.
- Brakes: Lock the scanner in position when necessary for more stable scans.
- Magnetic Wheels: Easily translate probes across ferrous surfaces with this manual scanner.
Semi-Automated Non-Ferrous Weld Inspection
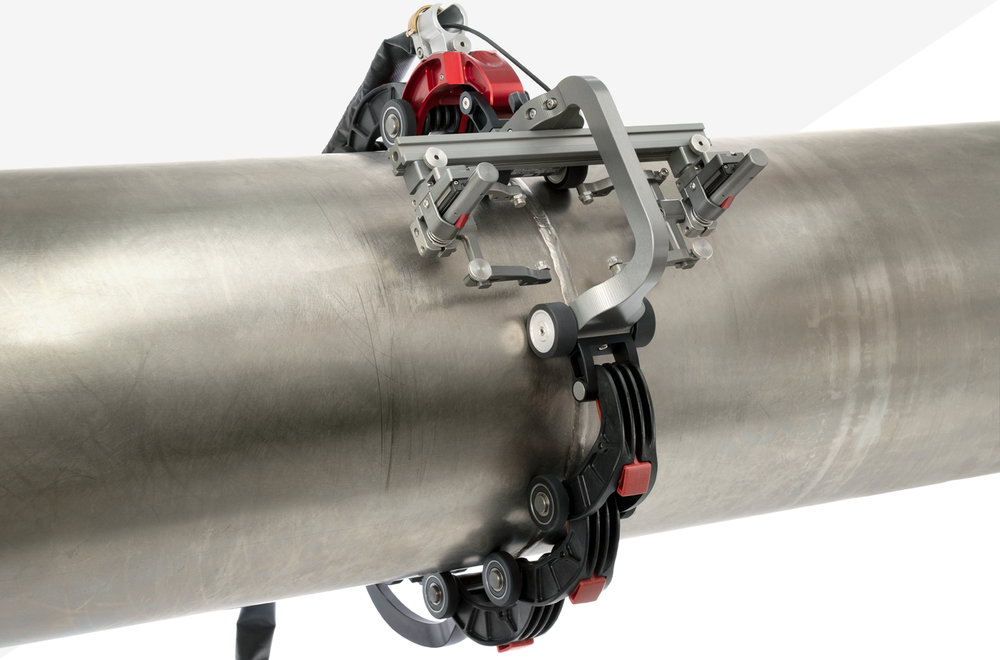
Designed for the unique challenges of non-ferrous material inspection, the advanced chain scanner delivers exceptional alignment, stability, and precise encoded probe positioning. It is compatible with a wide range of materials, including austenitic steel, Glass Fiber-Reinforced Plastic (GFRP/GRP), Carbon Fiber-Reinforced Plastic (CFRP/CRP), High-Density Polyethylene (HDPE), and various plastics. Multiple scanner configurations are available to suit different inspection needs.
The innovative scanner body allows operation in tight spaces, requiring as little as 10cm (3.94in) of width for single-probe scanning and just 25cm (9.84in) for dual-probe scanning. This compact design minimizes preparation time and effort when inspecting pipes. Equipped with integrated positional encoding and a quick link system, the scanner can adapt to a variety of diameters on both ferrous and non-ferrous surfaces, making your inspection process more efficient than ever.
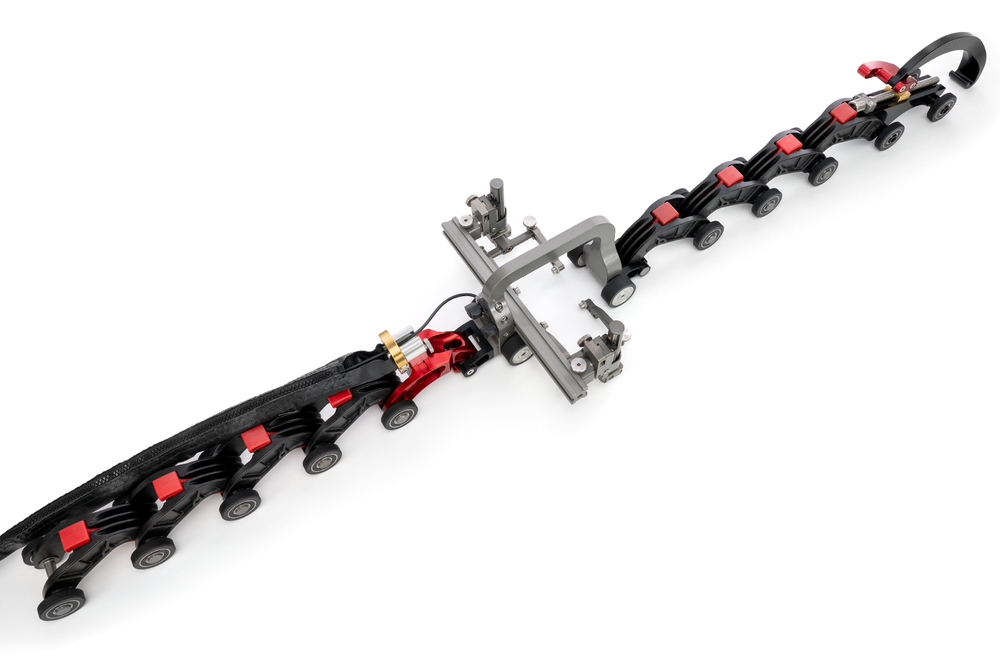
This advanced manual chain scanner ensures accurate and reliable inspections by smoothly moving phased array probes around pipes, vessels, and tanks. With the ability to adapt quickly to diameters ranging from 10.2 to 96.5cm (4 to 38in), the scanner brings a new level of precision to your inspections on a variety of materials.
Key Features:
- Minimal Footprint: Single-probe scanning requires only 10cm (3.94in) of width, while dual-probe scanning can be done with just 25cm (9.84in), making it ideal for space-restricted environments.
- Adjustable Chain: Inspect pipe diameters from 10.7 to 96.5cm (4.2 to 38in) using quick links that can be easily added or removed as needed.
- Quick Link System: The quick links connect securely without complicated tools or lengthy processes. Simply latch them together, or press a button to disconnect—no hassle, no frustration.
- Integrated Encoder: A positional X-axis encoder is built into the reduced width link, providing precise and accurate scanner positioning. The encoder is fully compatible with standard instruments.
- Versatile Vertical Probe Holder: The near infinitely adjustable vertical probe holders position the probes right next to the weld and are compatible with most third-party wedges.
Experience seamless precision on ferrous and non-ferrous materials with the advanced chain scanner. Make your weld inspections faster, more accurate, and easier than ever.
Learn moreSemi-Automated High Temperature Weld Inspection
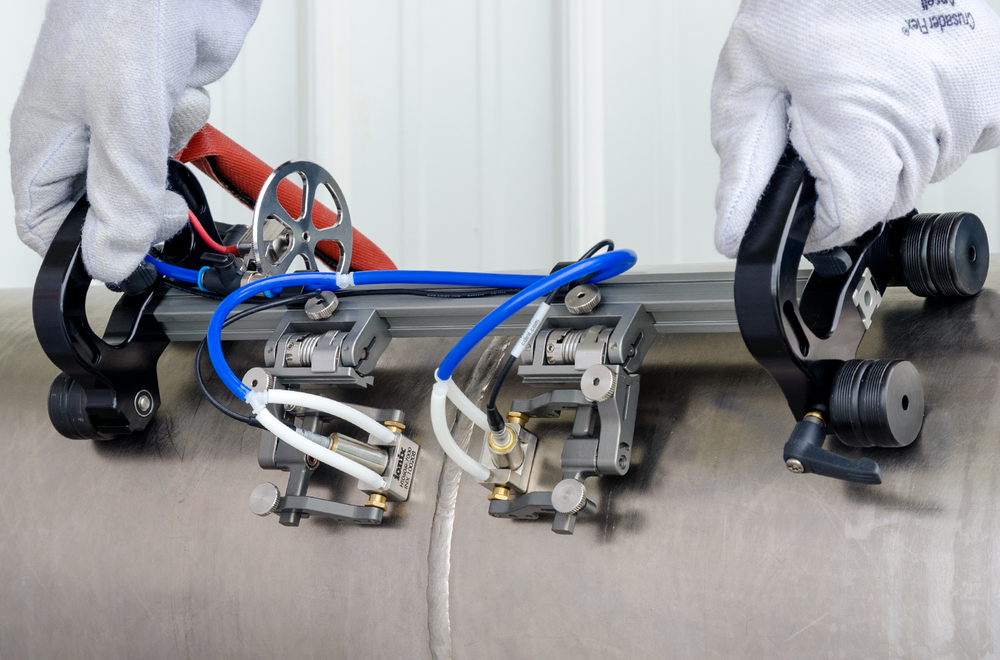
Reduce operational risk and boost productivity with real-time asset intelligence, even in high-temperature environments up to 350°C (662°F). This advanced scanner enables on-stream weld inspections without the need for shutdowns or isolation, allowing for continuous UT scans on hot assets while pipes and tubes remain online.
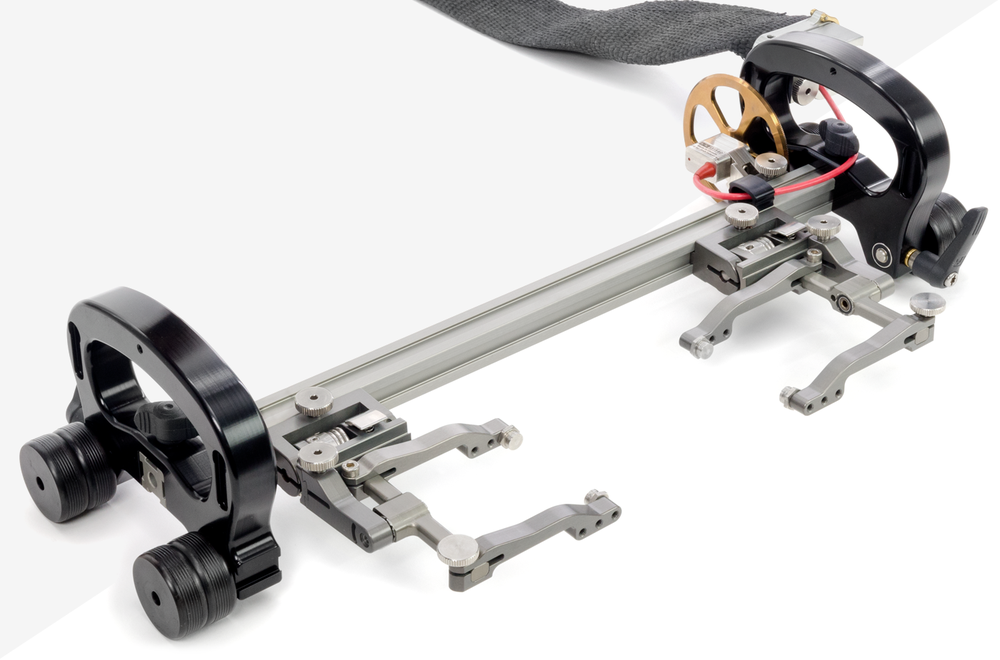
The magnetic high-temperature weld inspection scanner provides precise, encoded feedback for two probes, making it ideal for high-temperature applications. With optional alternate probe holder arms available, you can customize your setup to meet specific inspection needs.
Key Features:
- High-Temperature Encoder: Track scanner movement with precision. The oversized encoder wheel dissipates heat from the scan surface, protecting the sensitive components. The encoder is fully compatible with all industry-standard instruments.
- Ergonomic Handle: Available for enhanced scanner control and maneuverability during inspections.
- High-Temperature Cable Management: Protects cables, tubes, and hoses from contact with hot surfaces, ensuring uninterrupted operation.
- High-Temperature Magnetic Wheels: Urethane-coated magnetic wheels resist debris build-up, ensuring smooth operation. Stackable wheels offer additional magnetic attraction for more flexible inspections.
- Brake: Lock the scanner securely in place when needed for stable inspections.
- Cable Clips: Keep encoder cables neatly routed and organized for a clean, efficient setup.
Perform accurate, reliable weld inspections on high-temperature surfaces without interrupting operations. The high-temperature weld frame scanner ensures productivity and safety in even the most demanding environments.
Ask an ExpertSemi-Automated Flange Face Corrosion Inspection
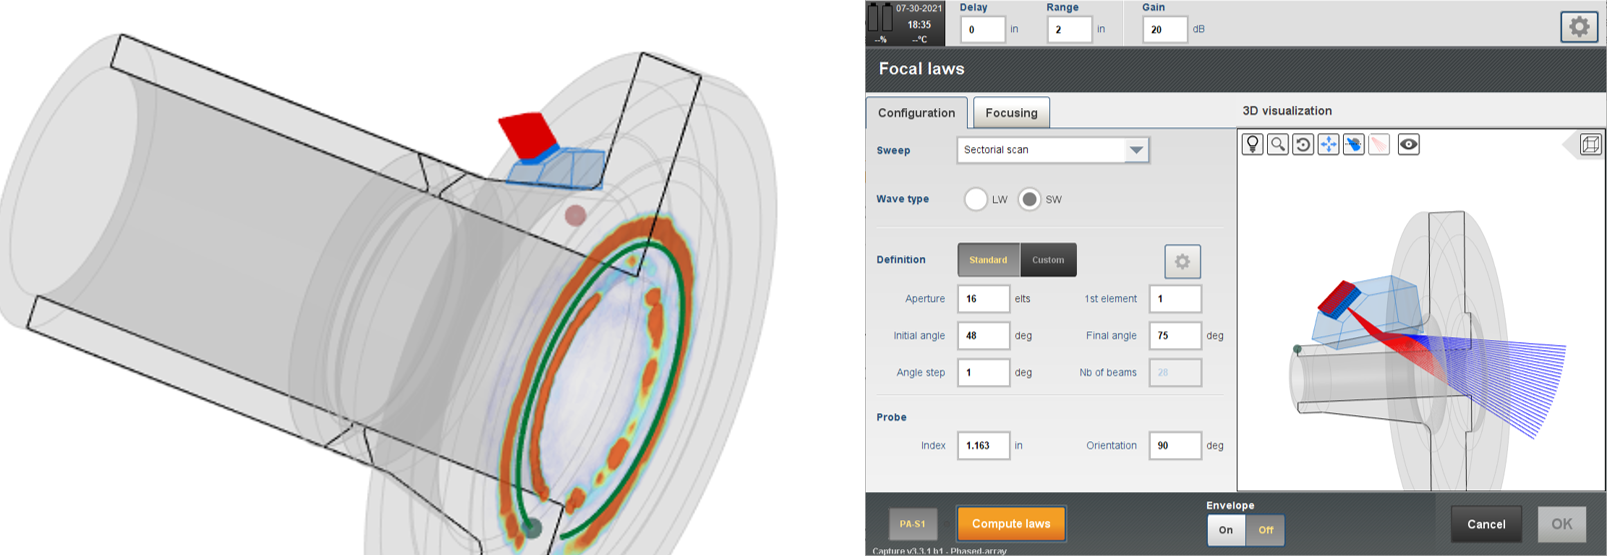
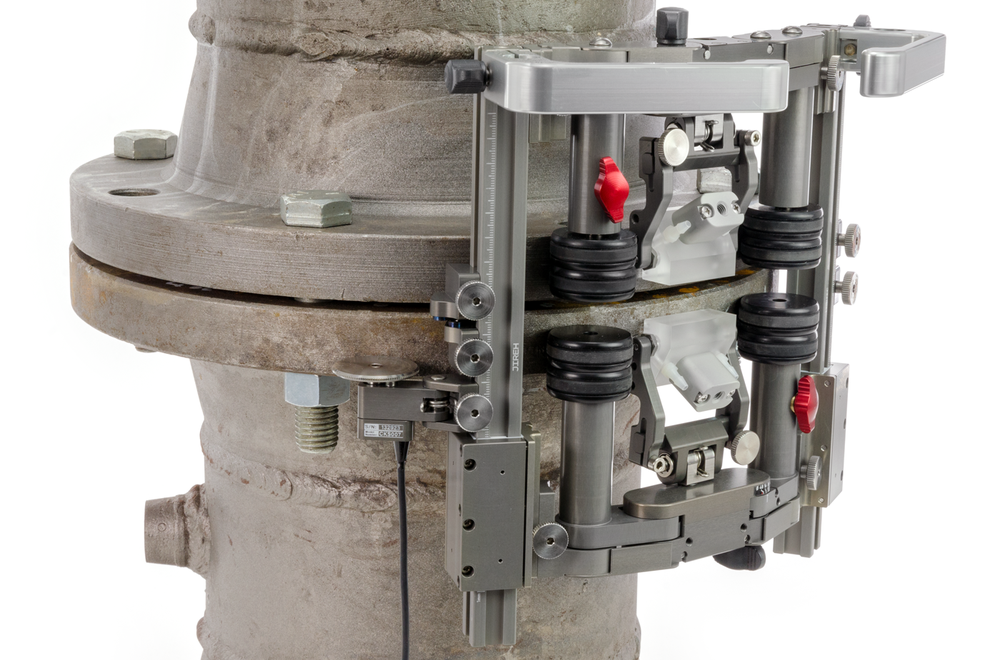
The flange scanner supports diverse flange coupling inspections, including flange face corrosion detection. It uses one or two phased array probes guided around the flange, outputting encoded positional feedback to any UT instrument. Magnetic wheels adhere to ferrous surfaces, and an articulating frame allows use on diameters as small as 7.6cm (3in).
For scans from the tapered neck, a standard weld inspection scanner can be adapted by re-positioning handles and adjusting the tool post. While outer rim and bolt face inspections are typical, scanning from the tapered neck ensures 100% sealing face coverage. Check out this blog to learn more about this application.
Semi-Automated Nozzle Inspection
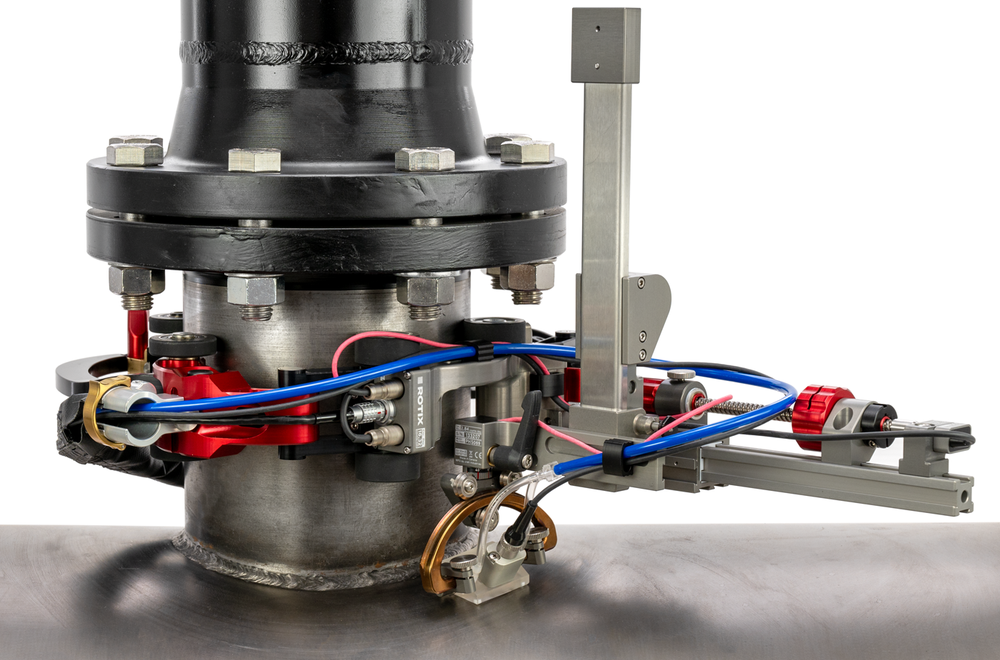
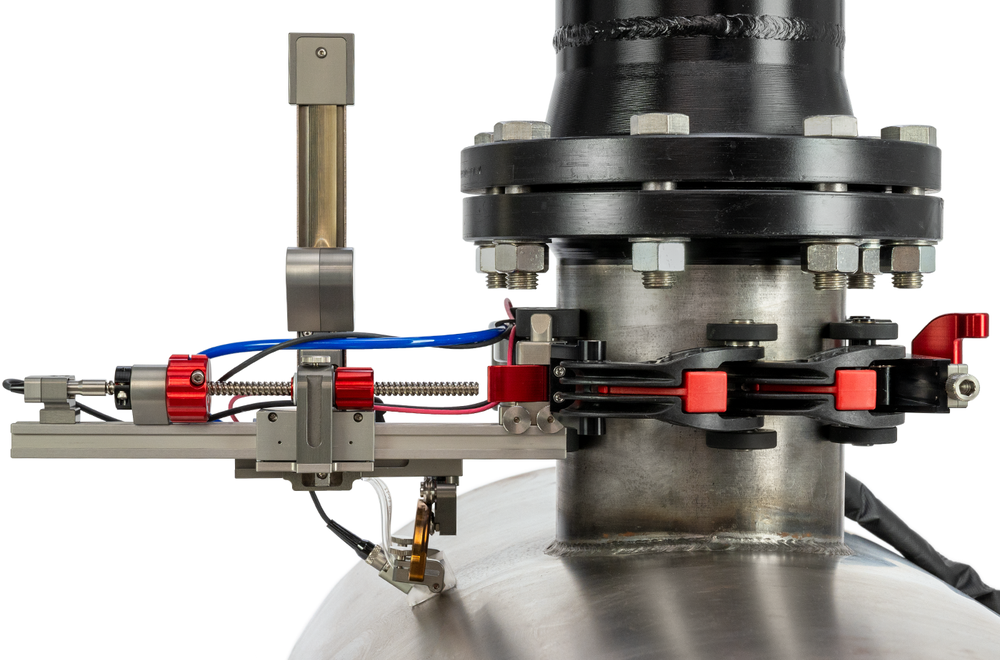
This versatile manual scanner is engineered specifically for inspecting nozzle welds, supporting two-axis and three-axis instruments. Adaptable for a wide range of 90-degree nozzle sizes from 76.2mm (3in) upward, the nozzle weld scanner is compatible with both ferritic and austenitic materials and seamlessly integrates with Gekko instruments. With just 127mm (5in) clearance, it is ideal for low-clearance environments.
The nozzle weld scanner combines stability with precision, using an innovative chain system for secure inspection on ferrous and non-ferrous surfaces. A long-stroke, encoded probe holder enables accurate skew angle measurements, providing efficient and reliable nozzle weld inspections, even in tight spaces requiring only 12.5cm (4.9in) between the vessel and flange.
Key Features:
- Flange Inspection: Designed to accommodate flanges with heights as low as 12.5cm (4.9in) to the vessel. The adaptable design easily adjusts to different diameters, ensuring comprehensive weld inspections.
- Adjustable Quick Link Chain: The quick links and adjustable buckle allow seamless scanning across varying nozzle and flange diameters. Connecting and configuring chain lengths is quick and effortless.
- Encoded Skew Vertical Probe Holder: Offers 12.2cm (4.8in) of vertical travel with encoded skew measurement, providing precise angle adjustments for the probe.
- Skew Encoding: Adjust the probe direction independently with encoded skew, delivering seamless angle measurement feedback directly to your instrument for enhanced flexibility.
- Slider Probe Positioning System (PPS): Fine-tune the probe’s location quickly with the leadscrew system, saving time and ensuring stable positioning. A lock knob prevents accidental movement during inspection.
- Y-Axis Encoding: The PPS encoder provides accurate, real-time feedback on probe position, ensuring high accuracy in inspections.
- Quick Links: Securely connect quick links without tools or hassle. Latch and disconnect with a simple press, eliminating the frustrations of complex connectors.
- Cable Management: Cable clips and management solutions keep tubes and cables securely organized, protecting them from damage and prolonging equipment life. (Cable management sleeving sold separately)
Experience efficient, precise nozzle weld inspections with this advanced solution, designed for ultimate flexibility and control on a range of materials and configurations.
Ask an ExpertEntry Level Inspections
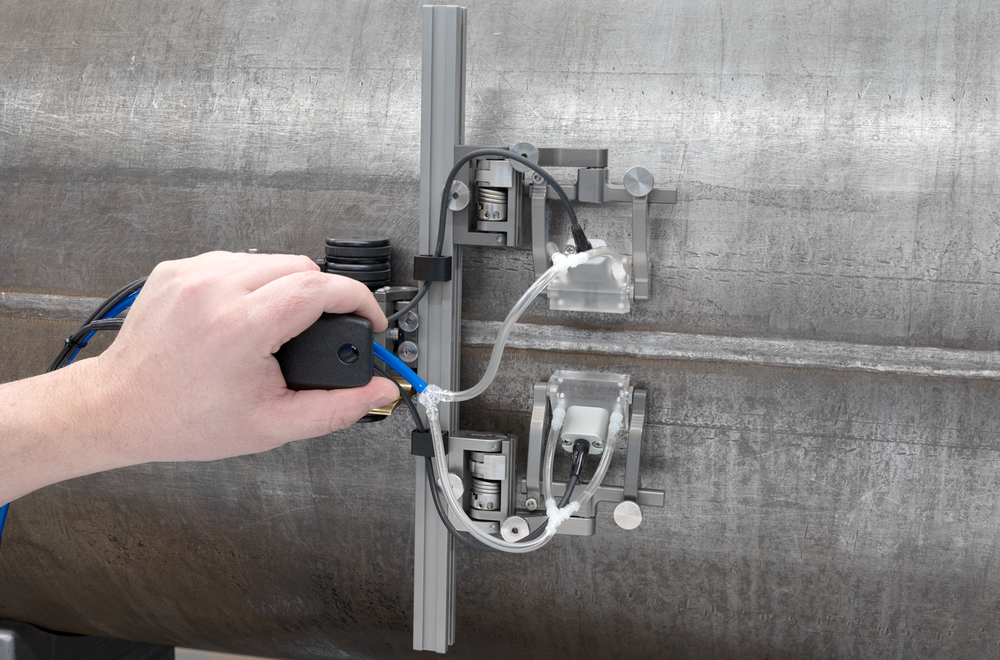
Entry-level weld scanners are compact, streamlined tools designed for efficient and accurate weld inspections. Their quick setup, intuitive controls, and integrated positional encoding ensure ease of use for a variety of welding applications. Whether you're carrying phased array (PA) or TOFD probes, these scanners offer flexibility on ferrous surfaces, making them versatile solutions for weld inspections on piping and vessels.
Equipped with convenient features like magnetic wheels, cable management, and highly adjustable slip joint probe holders, these scanners maximize efficiency while minimizing clutter. The built-in ergonomic handle further enhances maneuverability, making inspections easier and more comfortable.
Key Features:
- Dual Probe Weld Inspection: Designed to straddle welds on ferrous pipes, the scanner accommodates two TOFD or PA probes for thorough inspections.
- Configurable Design: Tailor your setup with additional magnetic wheels, probe holders, or alternate frame bars, offering endless configuration possibilities to meet your specific inspection needs.
- Brake: Securely lock the scanner in place when needed using the built-in brake.
- Cable Management: Built-in cable clips keep cables organized and protected during operation.
- Positional Encoding: The scanner integrates an encoder compatible with all standard instruments, ensuring seamless compatibility across applications.
- Magnetic Wheels: Urethane-coated magnetic wheels provide smooth mobility, resist debris, and can be stacked for increased magnetic attraction when required.
- Ergonomic Handle: The injection-molded handle offers a sturdy, comfortable grip for effortless scanner control during inspections.
- Carabiner Attachment Point: Safeguard the scanner during handling or rope access applications by securing it with a carabiner, preventing drops or aiding in forward movement when needed.
- TOFD or PAUT Inspection: Comes equipped with TOFD and phased array probe-holding arms for the slip joint probe holder, offering flexibility in inspection techniques.
- Slip Joint Probe Holder: The low-profile, adjustable holders accommodate most PA and TOFD probes, ensuring optimal alignment for accurate inspections.
- Modular Capabilities: Expand your capabilities by converting this entry-level scanner into a non-ferrous chain scanner, enhancing versatility across different materials.
Entry-Level Encoder Scanner with Universal Clamp System
Another entry-level option features a compact design that includes an encoder and a user-friendly universal clamp system. Despite its small size, it securely holds a wide range of probe and wedge combinations and can be operated with one hand, making it perfect for use in tight or restricted spaces. The innovative clamping system ensures rapid, effortless probe setup, making inspections quicker and more efficient.
Ask an Expert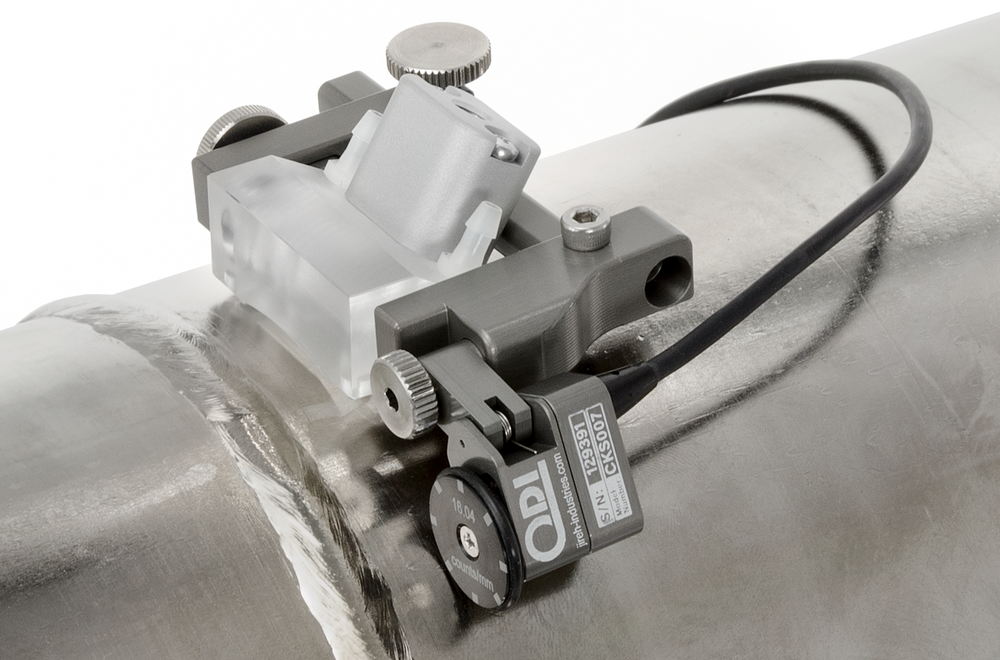
Specifications
Boiler Tube and Small Diameter Pipe Weld Inspection
21.4mm - 114.3mm (0.84in - 4.5in)1
1 mm (0.433 in)2
RS422 line driver, compatible with all standard encoder inputs
31.30 counts/mm (795.0 counts/in)
1 phased array wedges
3 m (9.8 ft)3
Ferrous and non-ferrous
11mm (0.43in)
11mm (0.43in)
53.5mm (2.1in)
105.6mm (4.2in)4
0.09kg (0.2lb)
3.1kg (6.8lb))5)
-20°C (-4°F) to 50°C (122°F)
Watertight (submersible)
1 Removal of the encoder cable guard is required for scan diameters smaller than 31.75mm (1.25in)
2 Scanner only; Transducers and wedges not included
3 Custom umbilical lengths are available.
4Does not include cable management (sleeving).
5Approximate shipping weight of standard kit contents.
Technical specifications are subject to change.
Carbon Steel Weld Inspection
25.4cm (10in) to flat1
15.2cm (6in) to flat
9.05 counts/mm (230.0 counts/in)
2 phased array wedges
5m (16.4ft)2
Ferrous materials
14cm (5.5in)
8.9cm (3.5in)
10.5cm (4.1in)
19cm (4.5in)
45.4cm (17.9in)
17.5cm (6.9in)
35cm (13.8in)
1.9kg (4.25lb)
-20°C (-4°F) to 50°C (122°F)
Watertight (submersible)
Minimum Wedge Width: 17.1mm (0.7in)
Maximum Wedge Width: 57.6mm (2.3in)3
Minimum Wedge Width: 17.1mm (0.7in)
Maximum Wedge Width: 45mm (1.8in)3
1 Capable of 10.2 cm (4 in) - 25.4 cm (10 in) using slip-joint probe holders.
2 Custom encoder cable lengths are available.
3Some arm styles may provide additional maximum wedge width.
Technical specifications are subject to change.
Non-Ferrous Weld Inspection
12.4 - 96.5cm (4.9 - 38in)
9.05 counts/mm (230.0 counts/in)
2 Phased Array Probes
5m (16.4ft)1
Ferrous or non-ferrous materials
10.7cm (4.2in)
10.5cm (4.1in)
43.5cm (17.1in)
17.5cm (6.9in)
1.4kg (3.1lb)
-20°C (-4°F) to 50°C (122°F)
Watertight (submersible)
17mm (0.67in)
55.8mm (2.2in)2
1 Custom encoder cable lengths are available.
2Some arm styles may provide additional maximum wedge width.
Technical specifications are subject to change.
High Temperature Weld Inspection
10.2cm (4in) to flat
Flat to 152.4cm (60in)
4.28 counts/mm (108.7 counts/in)
2 or 4 wedges
5m (16.4ft)1
Ferrous materials
8.9cm (3.5in)
10.5cm (4.1in)
17.5cm (6.9in)
45.4cm (17.9in)
1.3kg (2.8lb)
-20°C (-4°F) to 350°C (662°F)
Watertight (submersible)
Minimum Wedge Width: 17mm (0.67in)
Maximum Wedge Width: 55.8mm (2.2in)2
Minimum Wedge Width: 17mm (0.67in) Maximum Wedge Width: 44.4mm (1.75in)2
1 Custom encoder cable lengths are available.
2Some arm styles may provide additional maximum wedge width.
Technical specifications are subject to change.
Nozzle Inspection
10.2cm - 60cm (4in - 24in)
16.3 counts/mm (414.5 counts/inch)
161.3 counts/mm (4096.0 counts/inch)
2.84 counts/deg.
1 wedge
5m (16.4ft)1
Non-ferrous or ferrous materials
31.9cm (12.6in)2
12.5cm (4.9in)
6.1cm (2.4in)
8cm (3.2in)
25cm (9.8in)
0.55kg (1.12lb)
32.2cm (12.7in)
11.6cm (4.6in)
14.2cm (5.6in)
0.75kg (1.7lb)
-20°C (-4°F) to 50°C (122°F)
Dust-tight, watertight (not submersible)
36mm (1.4in)3
44mm (1.7in)3
1 Custom encoder cable lengths are available.
2 Radial clearance with standard 30 cm (11.8 in) frame bar.
3 Alternate probe holders with additional vertical clearance are available.
Technical specifications are subject to change.


