Introducing Eddyfi Technologies' Automated Phased Array and Ultrasonic Testing Solutions—innovative, battery-powered systems designed for remote operation in the toughest environments. Equipped with Phased Array Ultrasonic Testing (PAUT) and conventional UT capabilities, these scanners redefine precision and productivity. Whether it's high-speed corrosion mapping, elevated-temperature assessments, one-axis corrosion scanning, or advanced weld inspections using Total Focusing Method (TFM) and Time of Flight Diffraction (TOFD), our solutions deliver unmatched versatility for even the most complex industrial applications. Experience seamless, reliable inspections that enhance asset integrity and maximize uptime.
Details
Our automated UT solutions are engineered for precision, productivity, and adaptability in applications such as:
- Corrosion Mapping View Brochure
- High Temperature Hydrogen Attack Detection View Brochure
- Boiler Tube and Small Diameter Pipe Weld Inspection View Brochure
- Austenitic Stainless Steel Weld Inspection View Brochure
- Carbon Steel Plate and Pipe Weld Inspection View Brochure
- Wet Hydrogen Sulfide Damage Assessment View Brochure
- Train Axle Inspection View Brochure
Benefits at a glance
- Fully automated, remote-controlled systems
- Portable, battery-operated for onsite flexibility
- Suitable for multiple asset types, from 70mm (2.75in) diameter pipes to flat plates
- Fast scanning speeds—up to 250mm/sec (9.84in/sec) scan speed and up to 762mm/sec (0-30in/sec) index speed
- Lightweight—Magnetic crawler weighs just 7.7kg (17lb) and non-magnetic crawler only weighs 4.6kg (10.2lb)
Explore our scanner configurations for:
Phased Array Corrosion Mapping
Eddyfi Technologies’ automated corrosion mapping solutions leverage advanced Phased Array Ultrasonic Testing to deliver precise, high-resolution data with a 1mm (0.04in) resolution. These systems are engineered to optimize productivity while maintaining a high Probability of Detection (PoD), ensuring even the smallest defects are detected with unparalleled accuracy.
- Complete turnkey package
- Fully recordable and auditable data sets
- High POD and accuracy
- Fast high -resolution scans at 1m (3.28ft) x 0.6m (1.96ft) in 90 seconds
- Dedicated software features for corrosion application
- Remote login options for setup, data capture, analysis
Phased Array Corrosion Mapping (PACM)
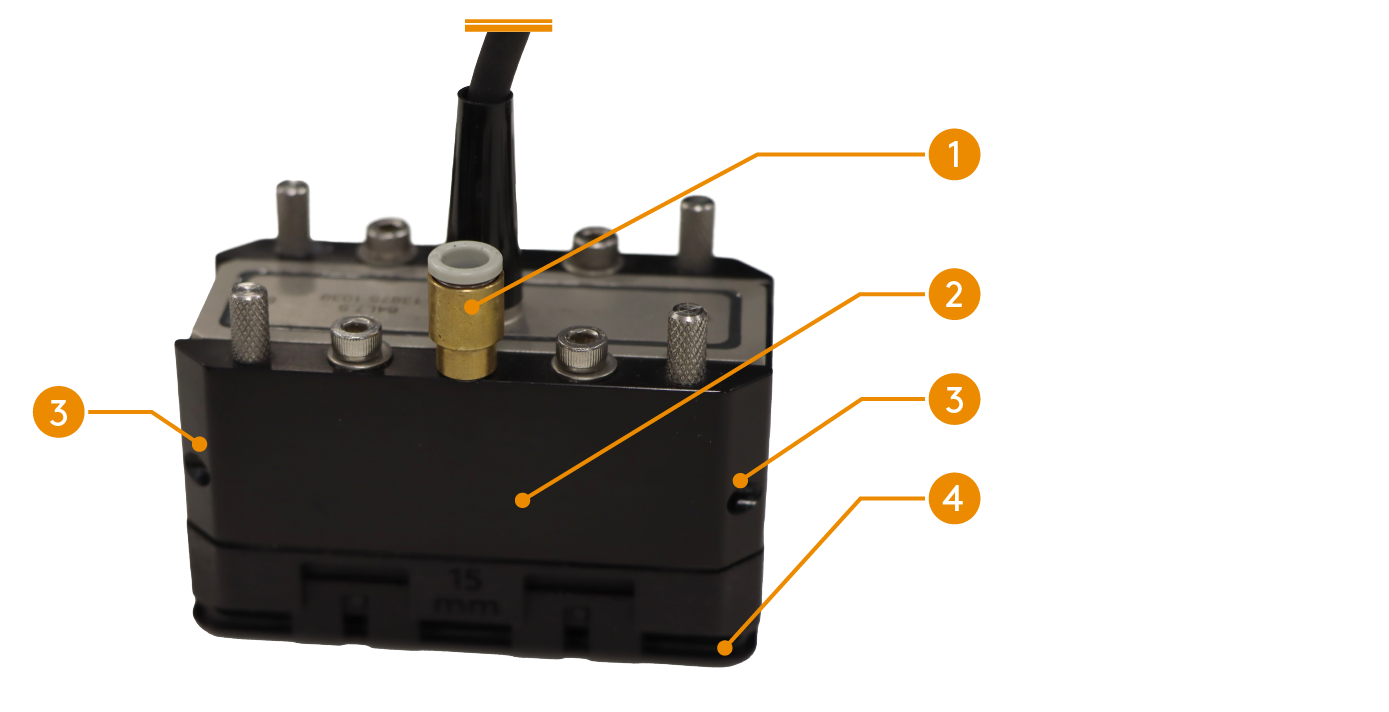
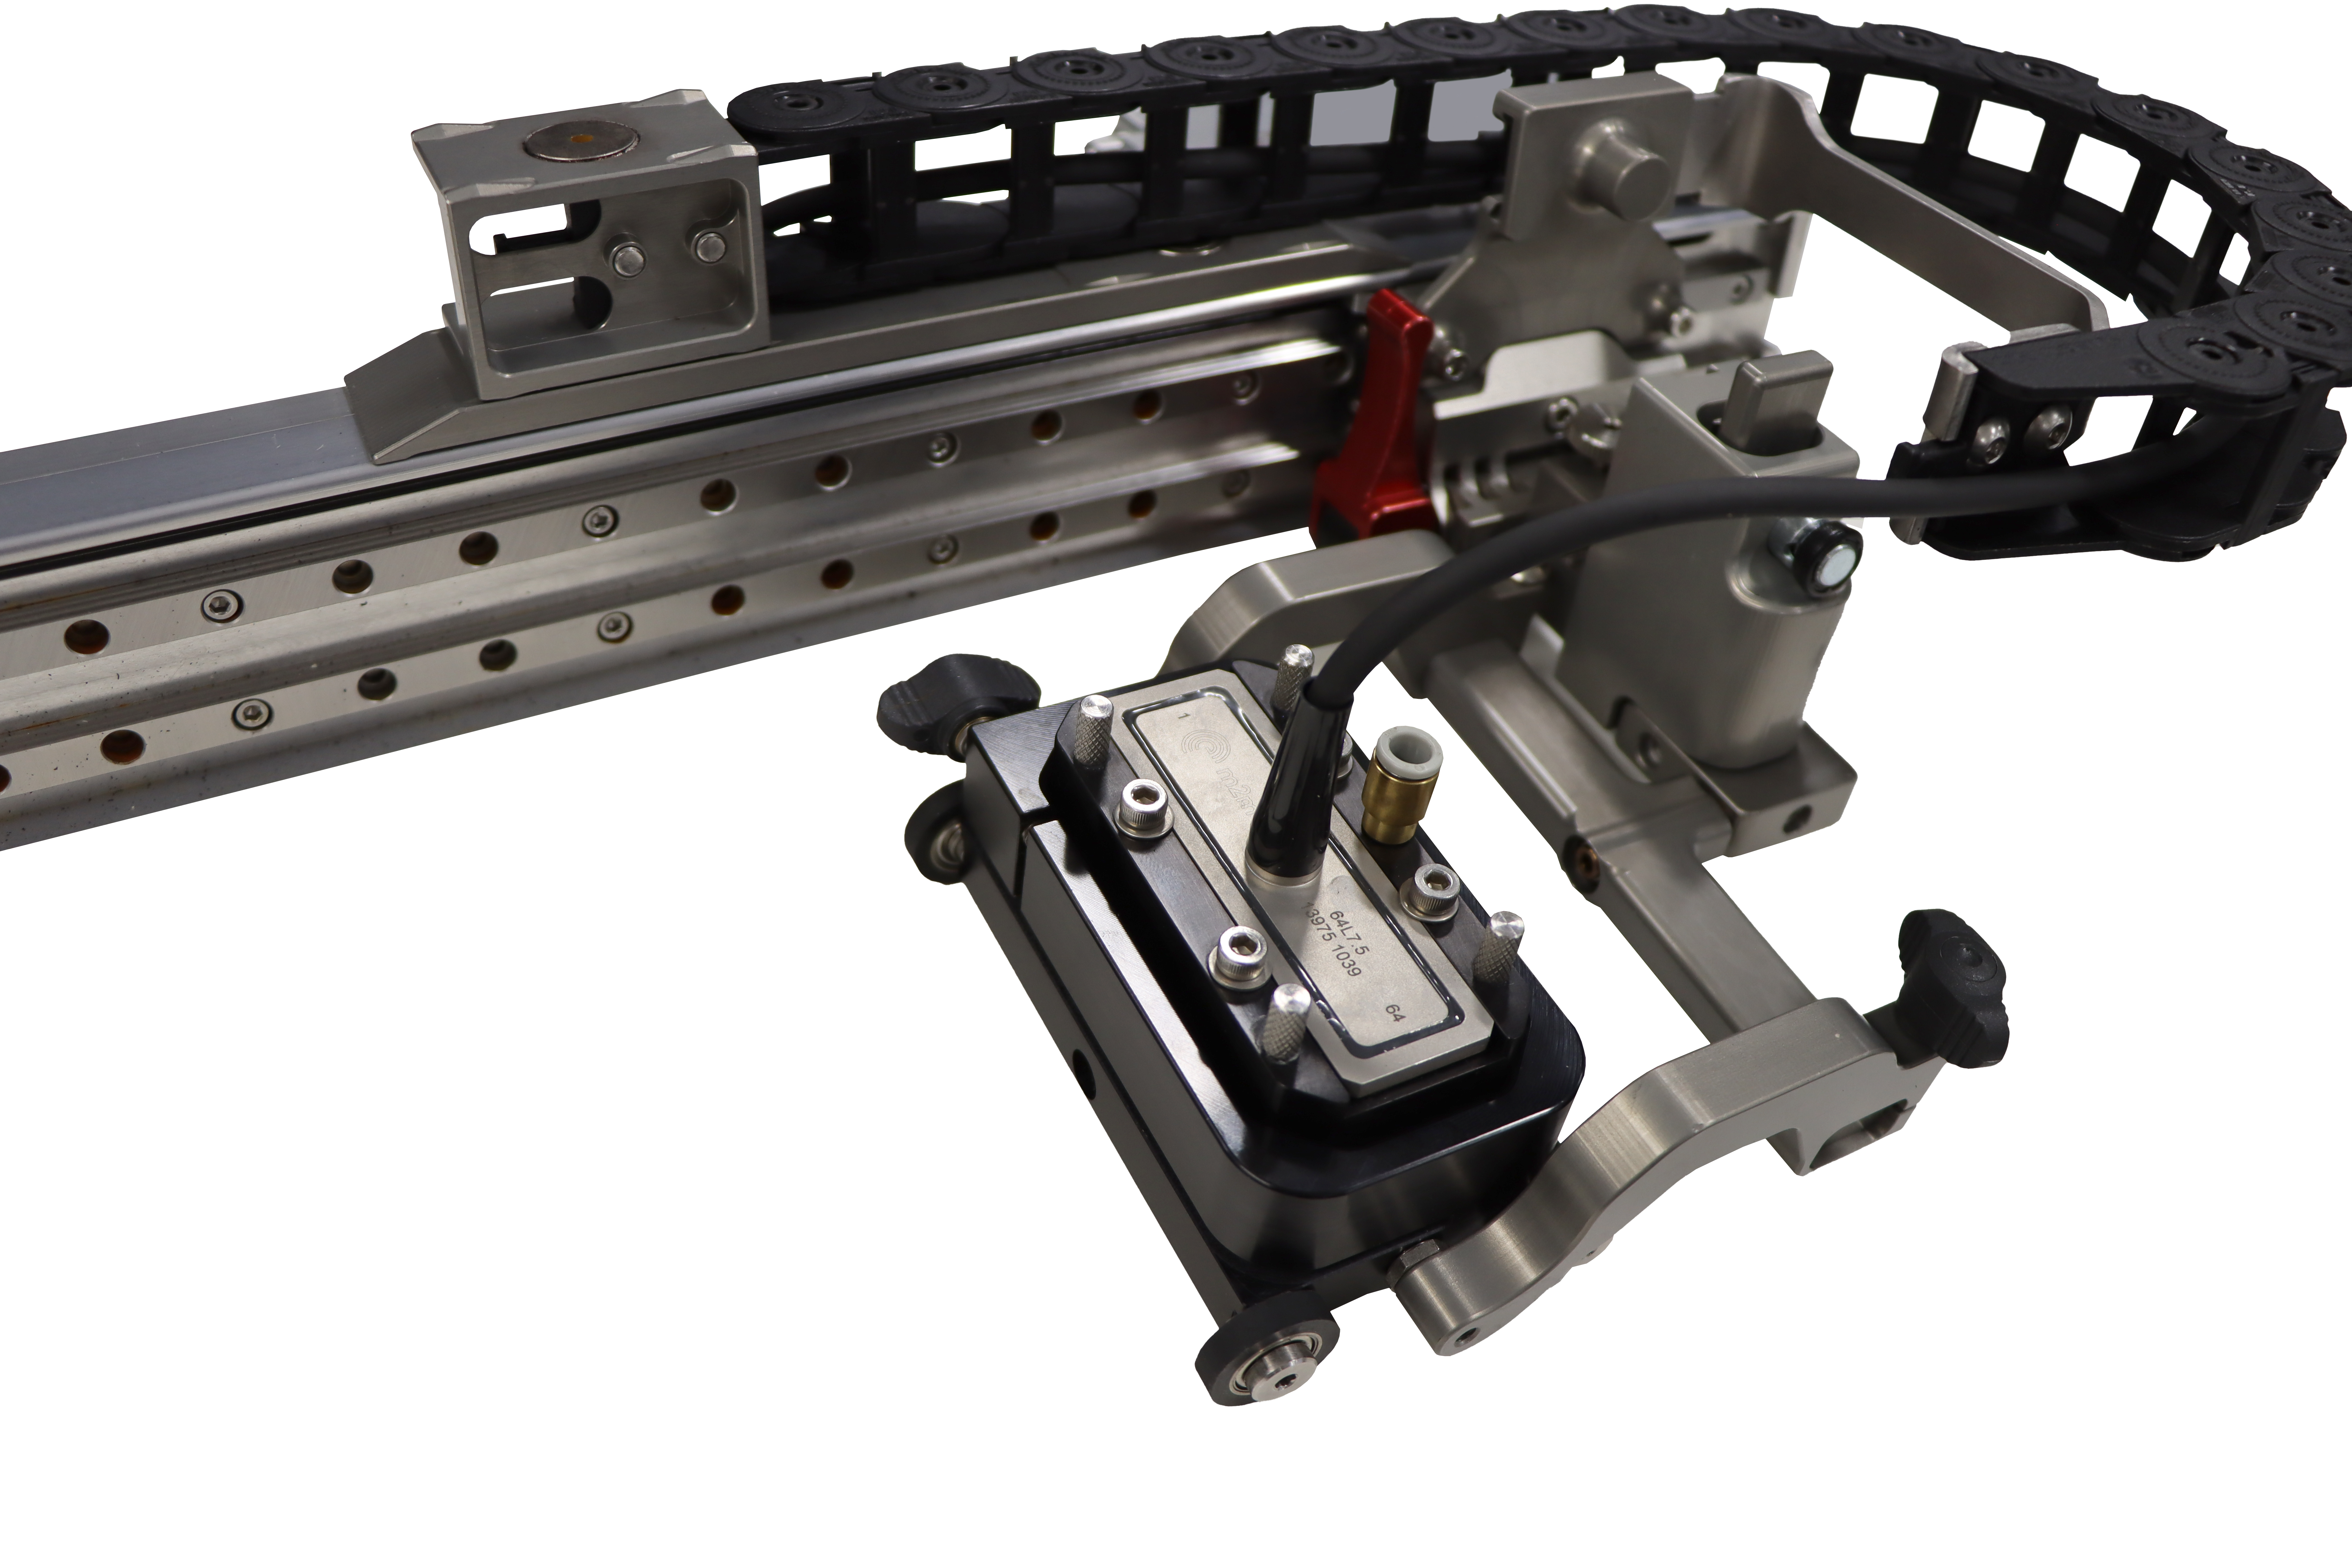
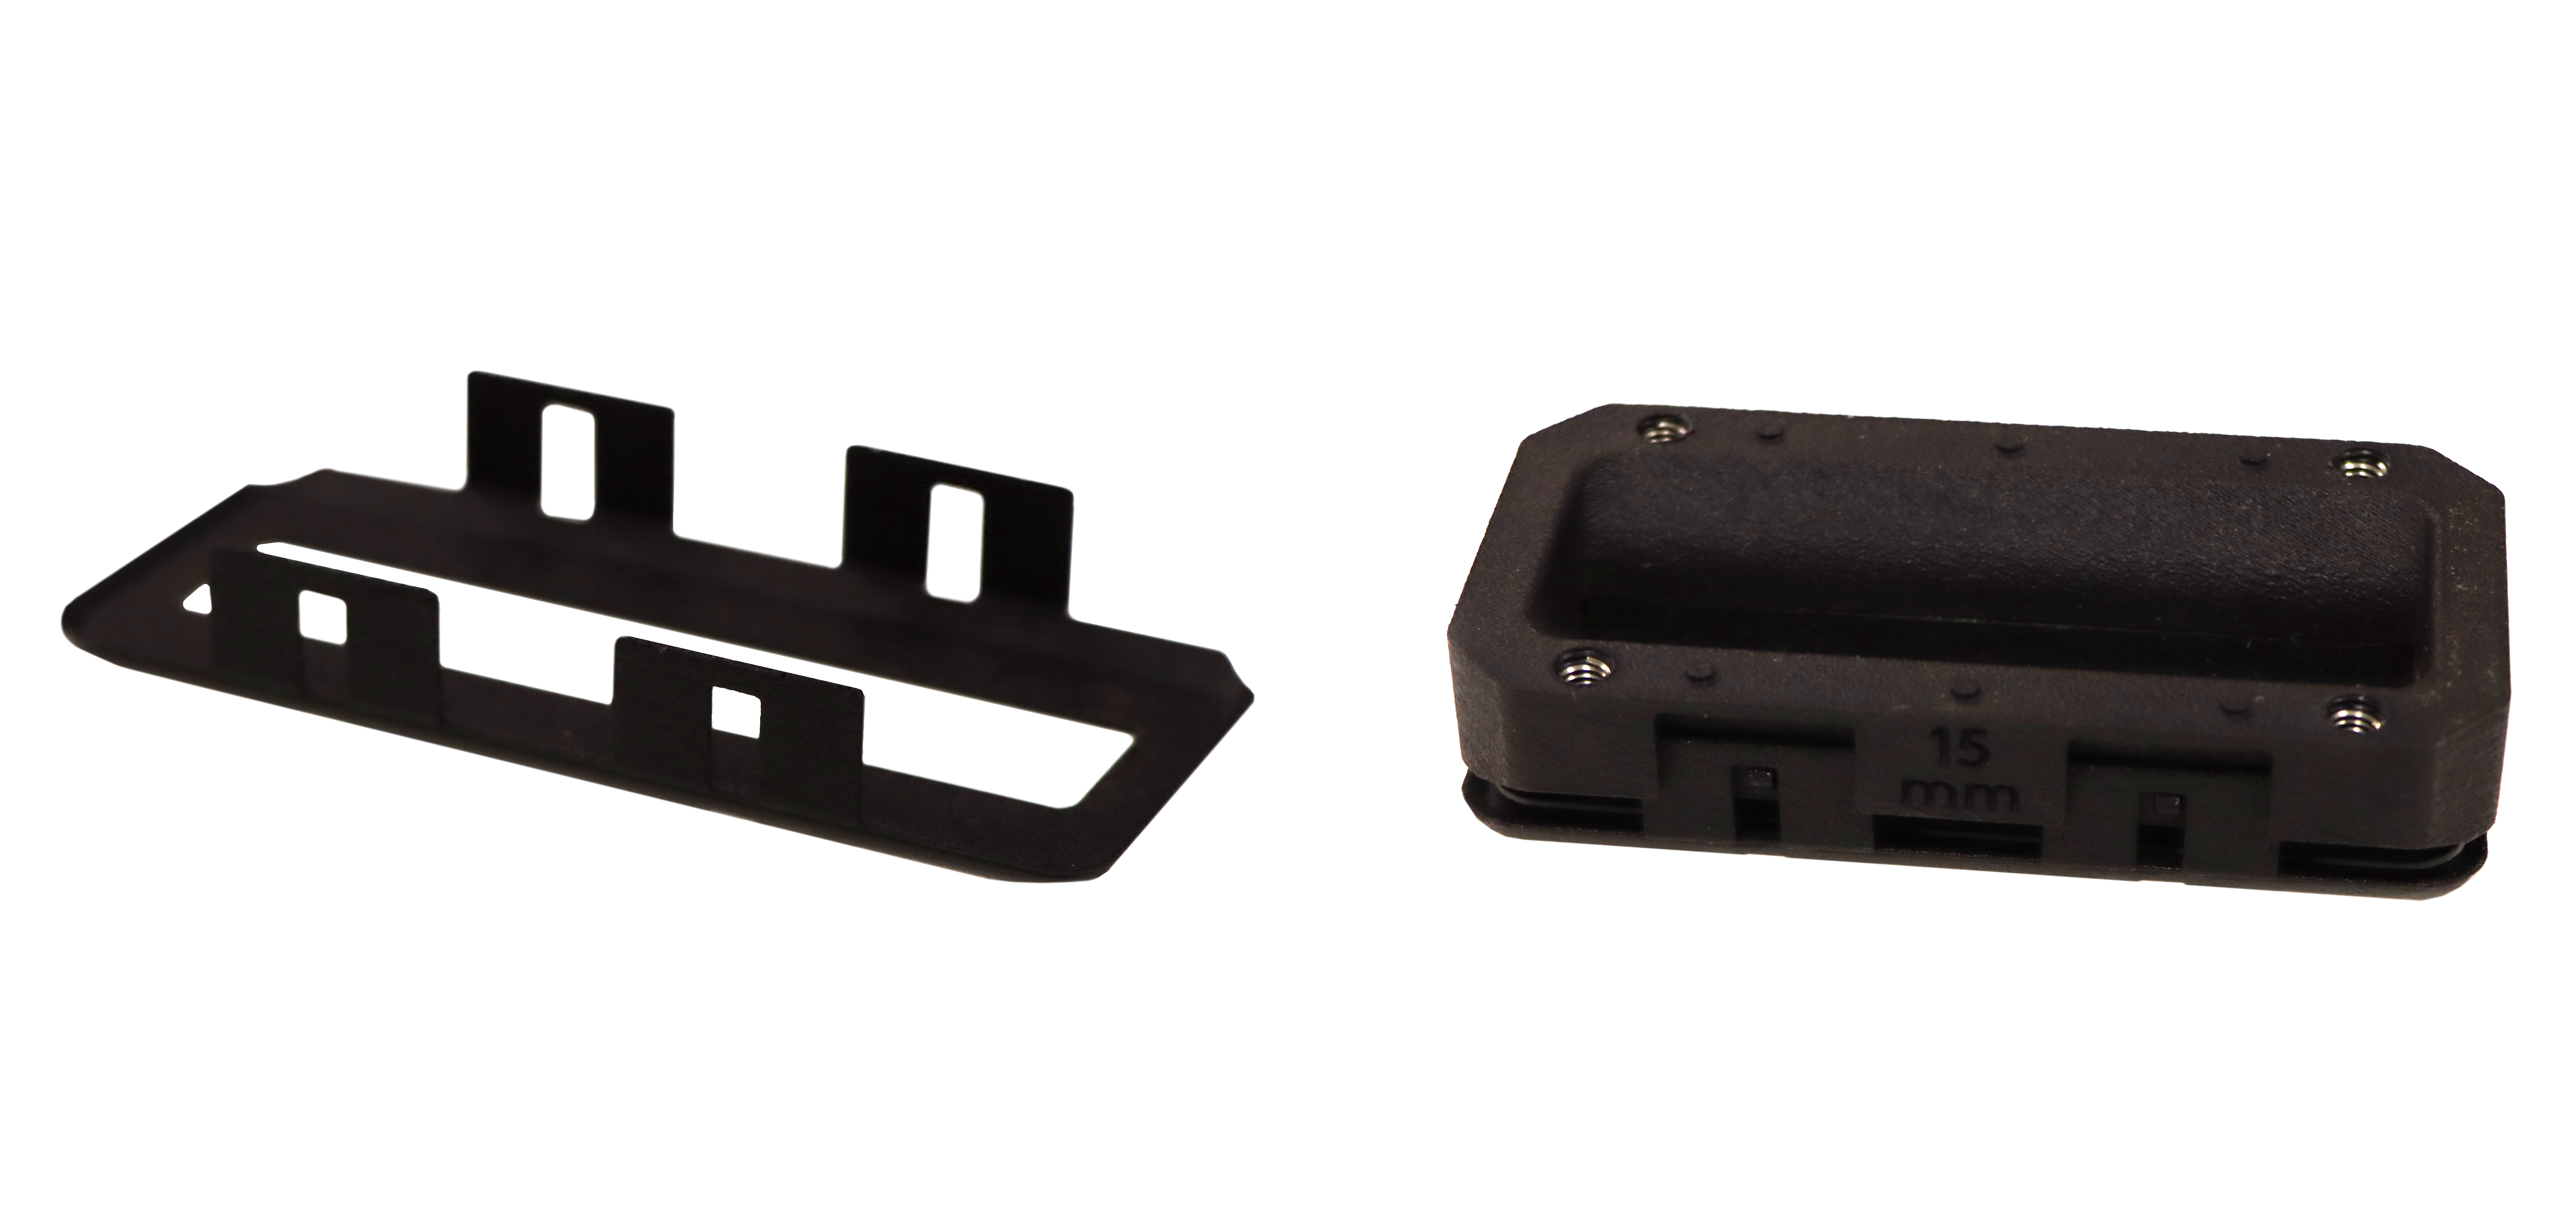
At the core of this system is the Aqualock waterbox technology, which provides stable water-column coupling that improves signal consistency, eliminates the need for a wedge, and enhances surface conformance. The unique flow dynamic air bubble removal design results in superior coupling for reliable inspections, even on challenging surfaces. The foam seal liner maximizes durability on rough surfaces, keeping you on track for your productivity goals. The combination of the Aqualock system and the 7.5MHz 64-element probe allows the ultrasound to propagate through the water column, providing a controlled, consistent environment that significantly reduces dead zones and improves data integrity.
With a wide electronic footprint and optimized beam coverage, these phased array probes significantly reduce scanning time while collecting high-quality, detailed data. This system is ideal for corrosion mapping applications, allowing for faster inspection speeds without compromising image quality or defect characterization.
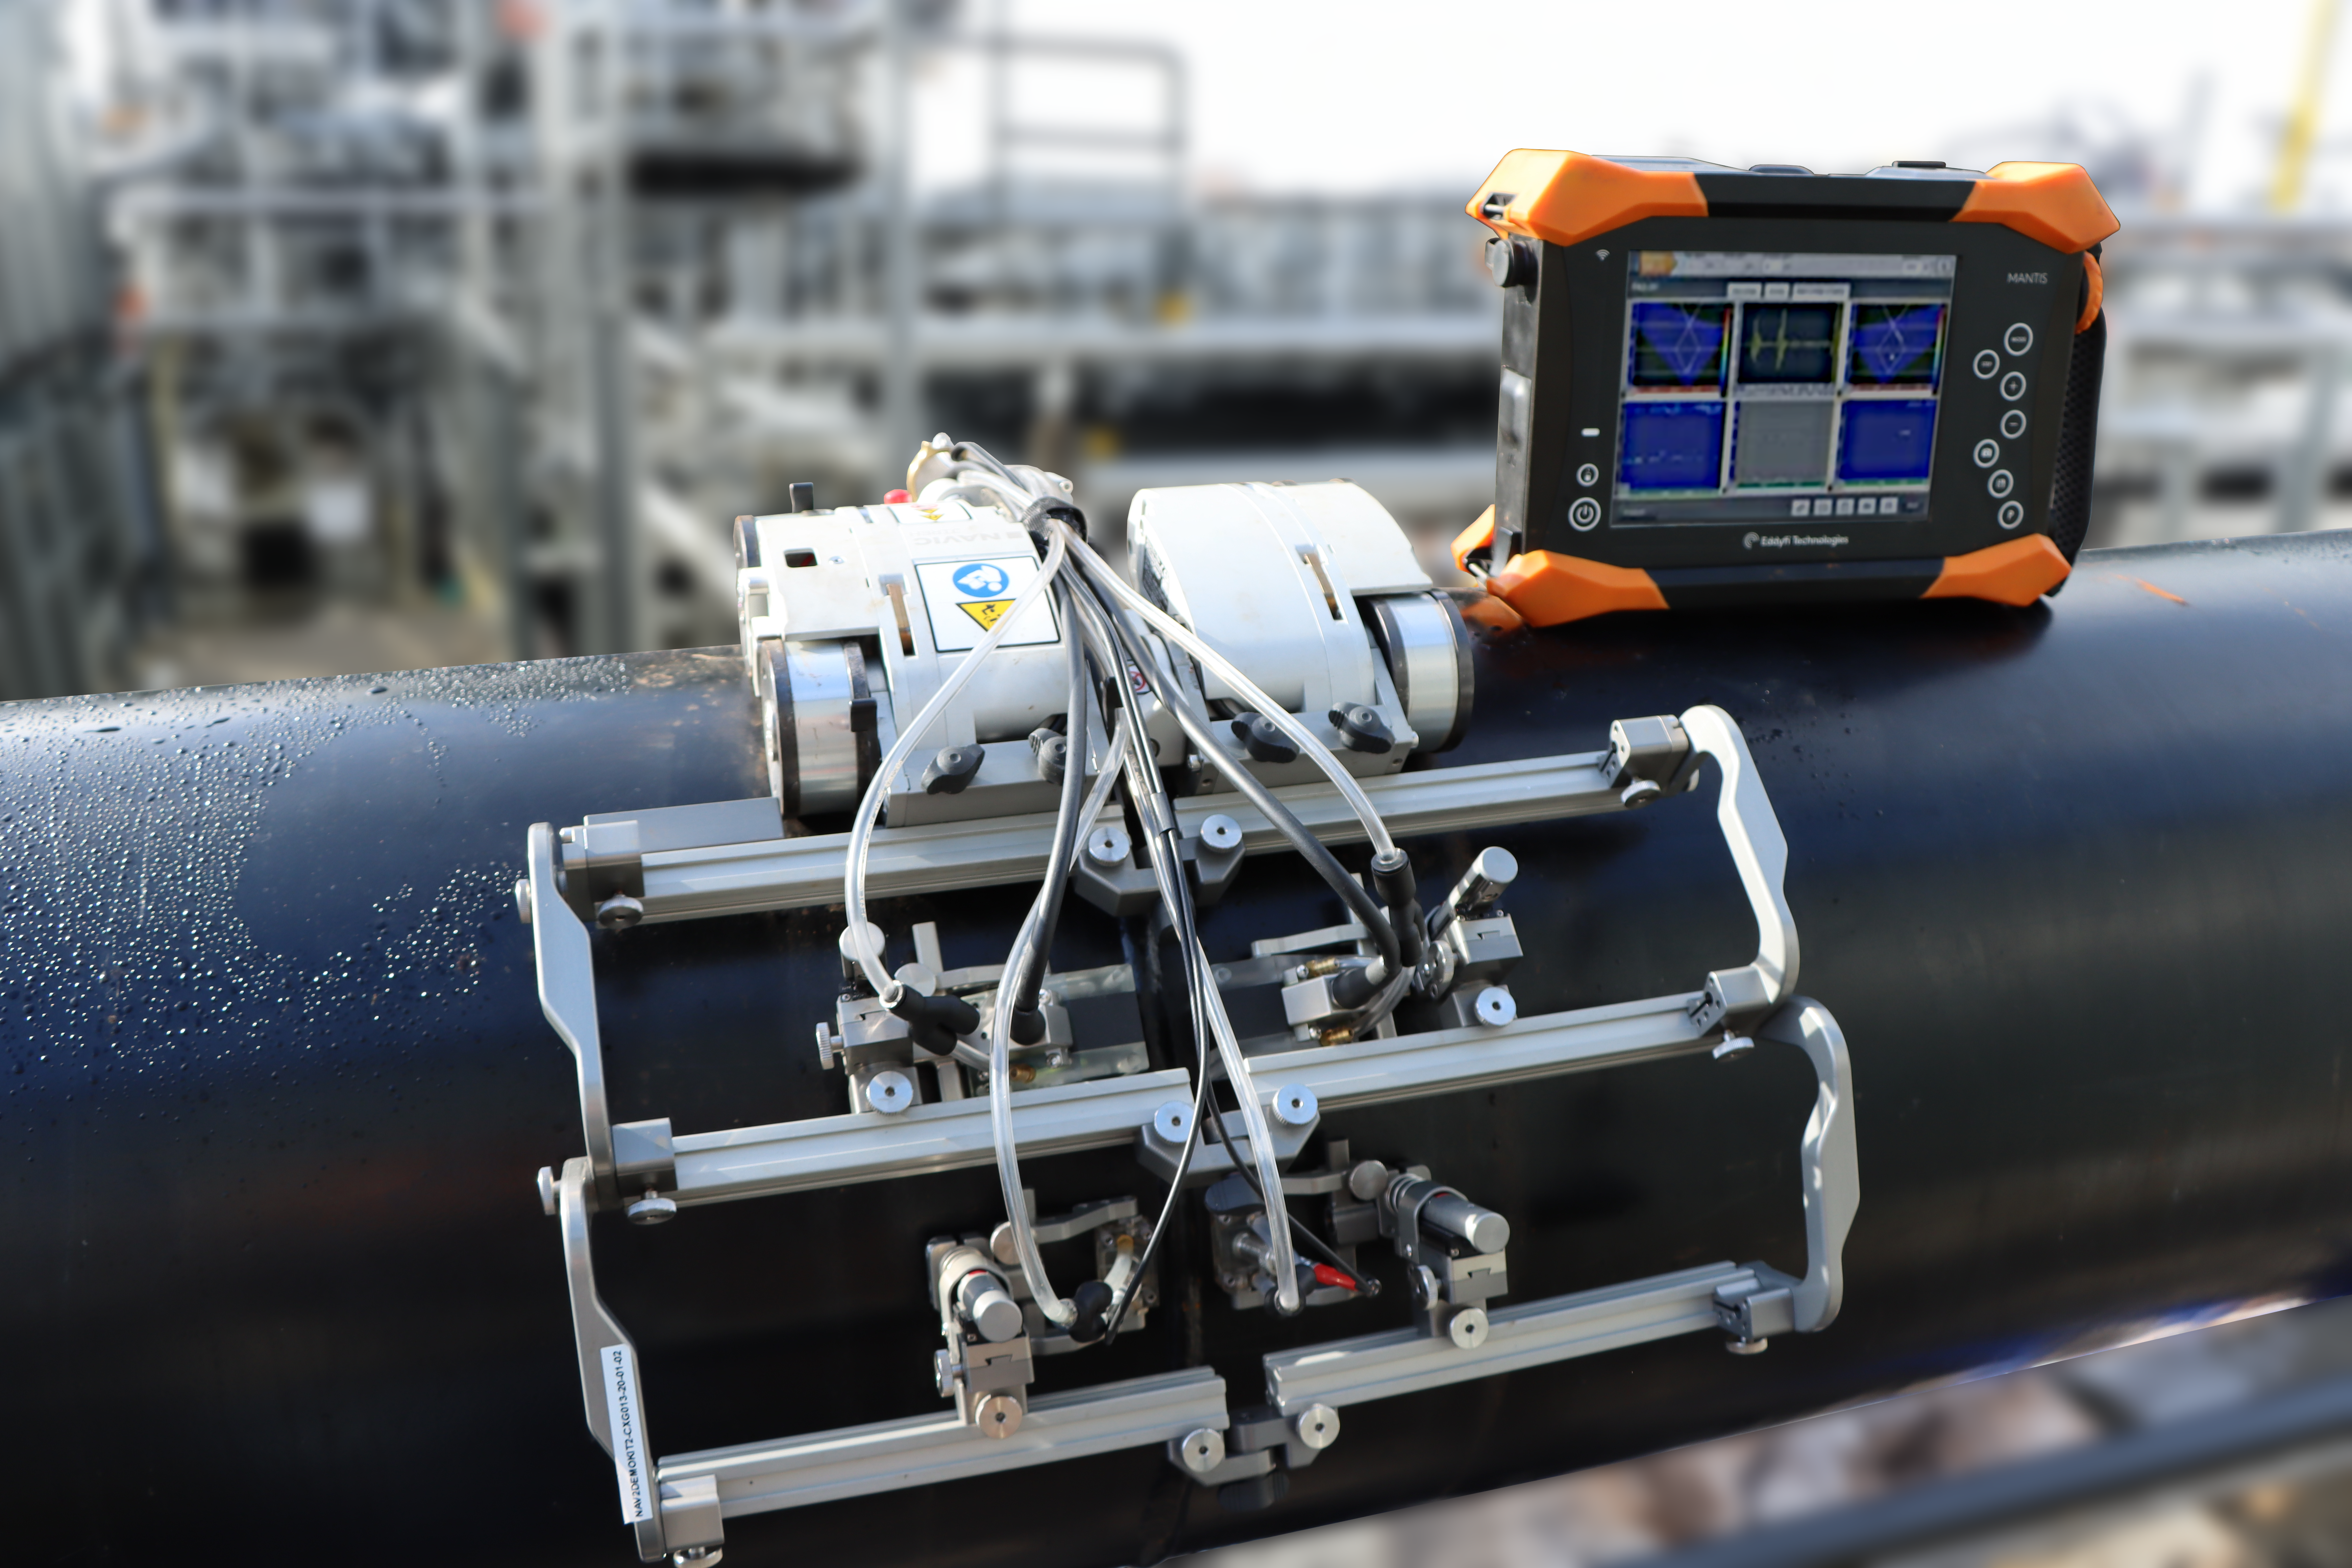
Complete Automated PAUT Inspection Solutions
Eddyfi Technologies’ automated inspection scanners, combined with our portable PAUT instruments—Gekko®, Mantis™, and TOPAZ®—deliver a complete and integrated solution for precise, reliable inspections. Our scanners seamlessly integrate with these instruments, leveraging advanced imaging capabilities like TFM and PAUT to enhance inspection accuracy and efficiency. Paired with our standard and custom probes, this combination offers a comprehensive PAUT package that adapts to a wide range of inspection needs, from routine to complex asset evaluations. Together, our scanners, instruments, and probes provide a high-performance, turnkey solution for the most demanding inspection challenges.
- Simple workflow
- Floating and tracking gates
- Assisted analysis
- Statistic tool (depth average, depth max, % wall loss calculator)
- Indication and report builder
- User defined digital output options
Trusted by industry leaders globally, Eddyfi Technologies’ automated inspection solutions offer critical infrastructure integrity assessments across sectors, including oil and gas, power generation, and maritime. Inspection applications include:
- Pressure vessels View Blog
- Pipelines View Blog
- Spherical and horizontal storage tanks View Blog
- Storage tank shells and roofs View Blog
- Ship hulls and other marine infrastructure View Blog
- Spiral welds View Blog
- and other critical infrastructure.
Subscribe to our weekly blog to stay Beyond Current!
Eddyfi Technologies’ automated scanners for corrosion mapping are built on robust, field-proven technology.
Magnetic
The battery-operated, modular and scalable system can deploy a range of PA & UT techniques for pressure vessel, storage tanks, pipelines, spheres, ship hull and other critical assets.
The steerable tractor units incorporate powerful magnetic drive wheels ensuring the scanner remains fixed to the inspection surface even while inverted making it ideal for assets ranging from 76.2mm (3in) OD to flat plate.
This system can also be used for single line corrosion scans.
Non-Magnetic
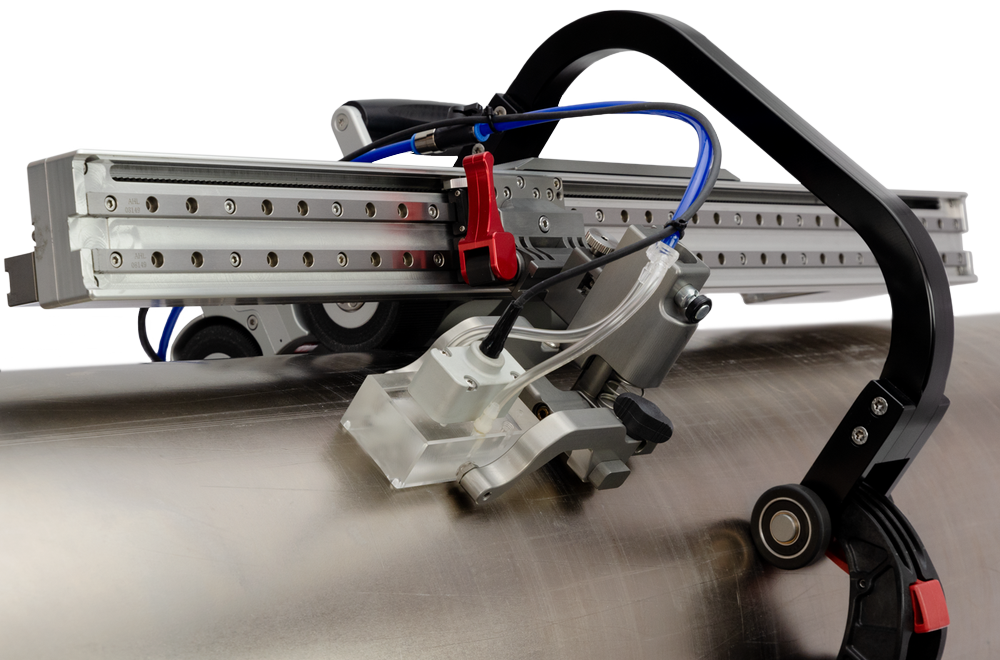
The battery-operated, chain driven versatile system is best suited to non-ferrous surfaces such as Glass Fiber-Reinforced Plastic (GFRP or GRP), Carbon Fiber-Reinforced Plastic (CFRP or CRP), High Density Polyethylene (HDPE), plastic and others. The system operates flawlessly on ferrous and non-ferrous surfaces with diameters ranging between 15.24 and 106.7cm (6 and 42in).
These versatile solutions deliver high-performance in a variety of Non-Intrusive Inspection (NII) applications, helping customers achieve critical integrity assessments with minimal downtime and reduced operational costs.
A key differentiator when deploying these systems, is the ability to deliver up to a 9:1 cost savings compared to traditional Internal Visual Inspection (IVI) methods, by reducing the need for extensive cleaning or radioactive waste disposal. Eddyfi Technologies offers a toolbox of solutions to maximize inspection efficiency and Probability of Detection (PoD), including:
- Ultrasonic corrosion mapping (capable of operating at up to 150°C / 302°F)
- Phased array ultrasonic testing corrosion mapping
- 1-Axis single line UT/PAUT scanning
Automated corrosion mapping has become an integral part of Non-Destructive Testing (NDT) campaigns, widely adopted across integrity management programs and written schemes of examination. While traditional corrosion mapping systems often rely on a coarse resolution—typically collecting data points every 3 to 5mm (0.12 to 0.20in)—Eddyfi Technologies’ advanced scanner solutions are engineered to optimize productivity while delivering precise, high-resolution data, improving both the speed and accuracy of inspections.
Eddyfi Technologies' automated scanners are equipped to detect a wide range of defects, including:
- General corrosion and erosion
- Microbial Induced Corrosion (MIC)
- Hydrogen Induced Cracking (HIC)
- Laminations and inclusions
- All welding defects
These solutions provide quantifiable, detailed defect characterization, enhancing inspection accuracy while increasing productivity. With high-resolution capabilities, you no longer need to sacrifice precision for speed.
Want to see the ultimate automated inspection solution in action? Request a demo!
Ultrasonic Corrosion Mapping
Eddyfi Technologies’ recommended conventional ultrasonic testing solution, when paired with an automated system, utilizes a single crystal focused probe with a local immersion water column, housed in a gimbaled holder. This setup ensures stable coupling and high-quality data acquisition, even in challenging environments.
One key advantage of this approach is that advanced corrosion mapping surveys can be performed without the need for phased array-qualified personnel. Despite this, it still delivers the high productivity, high PoD, and application-specific software features associated with more advanced systems. Twin crystal UT options are also available, further enhancing versatility.
The gimbaled probe holder design is particularly beneficial for assets with surface irregularities, such as storage tanks and ship hulls, where plate undulations are common. For users of Eddyfi Technologies’ automated solution, selecting Phased Array Corrosion Mapping (PACM) as the primary inspection method and adding the Single Crystal Ultrasonic Testing (SCUT) probe kit ensures comprehensive data coverage, even in the most difficult inspection scenarios.
With such a versatile and scalable system, there are many options available to tailor to your precise requirements. Multiple probe kits, umbilical lengths up to 60m, a range of corrosion probe holders, HD cameras and a range of raster arm lengths, this truly is the most advanced and versatile system of its kind on the market.
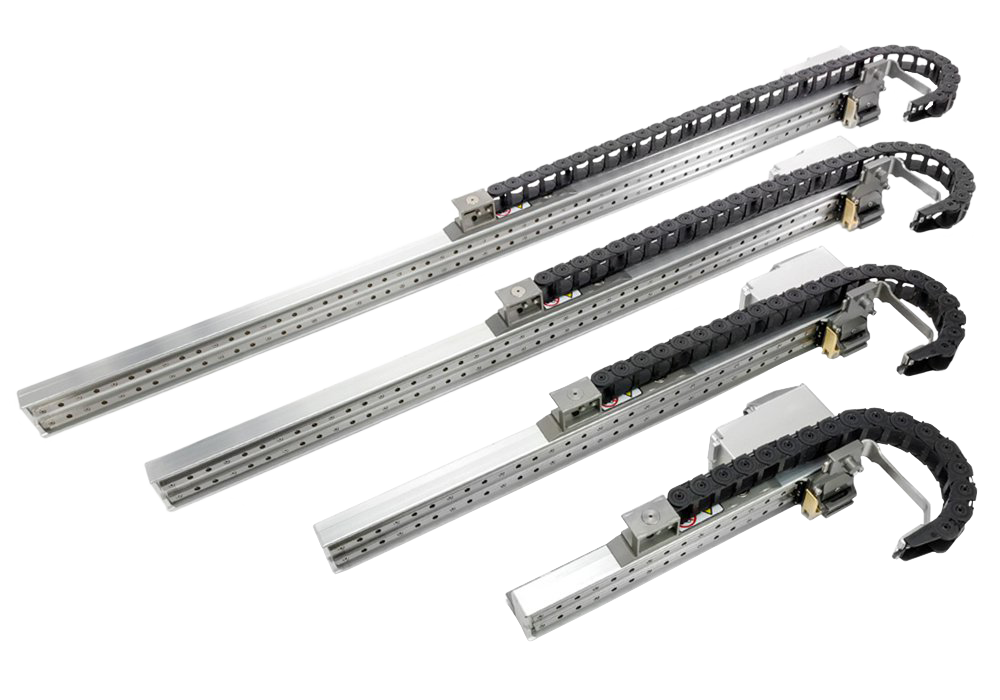
Interchangeable bridges ensure the system adapts to new requirements, allowing additional sizes to be incorporated throughout the product lifecycle, these range from 300mm (12in) to 1160mm (46in).
- 300mm (11.8in): Perfect for areas with limited access, such as vessel heads, or where smaller scan widths are necessary.
- 600mm (23.6in) and above: Ideal for high efficiency scanning of larger surfaces, including tank shells and pipelines.
One-Axis Corrosion Scanning
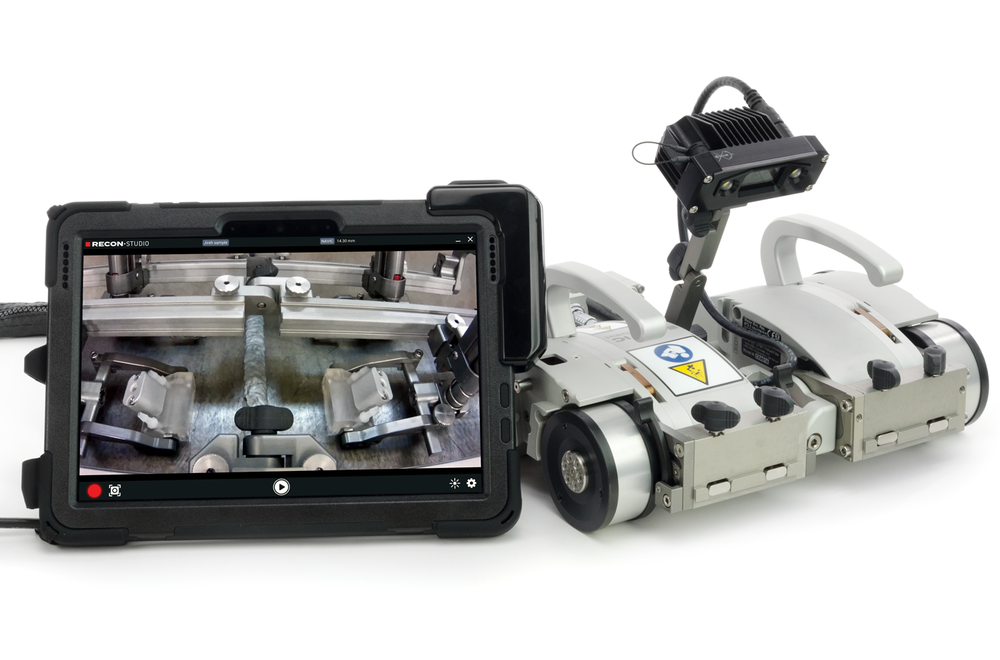
Eddyfi Technologies’ versatile automated system, when paired with one of our industry-leading PAUT instruments, enables efficient one-axis (single line) corrosion surveys. This system offers flexibility by allowing various probe holders to be mounted directly to the pods (crawler body), providing a streamlined solution for inspecting assets where a full raster scan may not be required.
This method serves as a highly effective alternative to the Scorpion2, particularly when an irrigated UT or PAUT approach is preferred for single line scans. With this one-axis solution, users can benefit from the system’s versatility for inspections on assets like storage tanks and pipelines.
Unsure which inspection solution will best suit your needs? If technique versatility for mapping, weld inspection, and visual inspections are part of your inspection plan, our experts are happy to help.
Contact us
PAUT & TOFD Weld Inspection
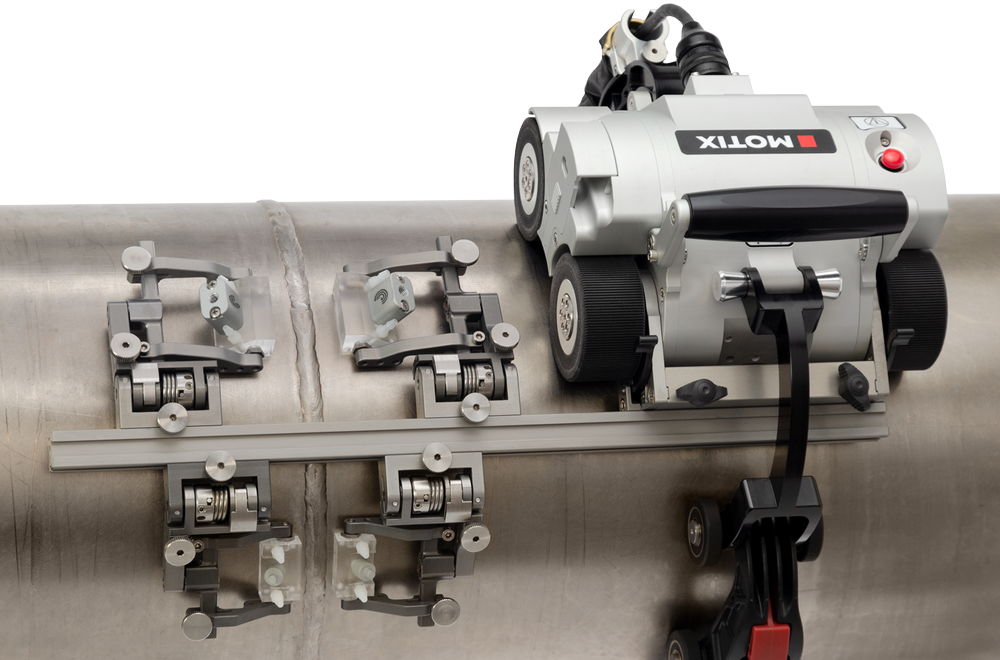
Eddyfi Technologies offers battery-operated, portable scanning solutions for comprehensive weld inspections on both ferrous and non-ferrous materials. Utilizing phased array ultrasonic testing and time of flight diffraction techniques, these systems ensure accurate defect detection, even in challenging or hard-to-reach areas. The range of evolutive weld inspection solutions have been developed to successfully interrogate various weld types in different conditions:
Weld geometries, diameters, thicknesses
Orientation – circumferential, long seam and spiral welds; accessible from either one or both sides
Note that the standard tool post arms these scanners are supplied with allows for a minimum wedge width of 17.1mm (0.7in) up to a maximum width of 57.6mm (2.3in); a range of alternative weld frames, tool posts, and tool post arms are available.
- Comprehensive setup and analysis tools onboard
- High productivity weld inspection
- Industry-leading signal quality
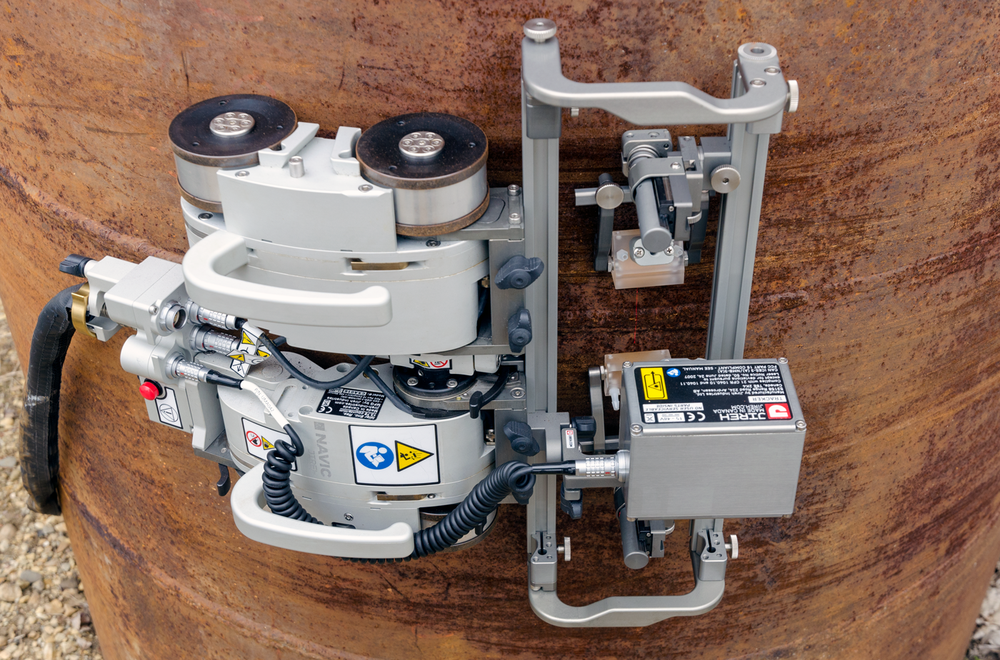
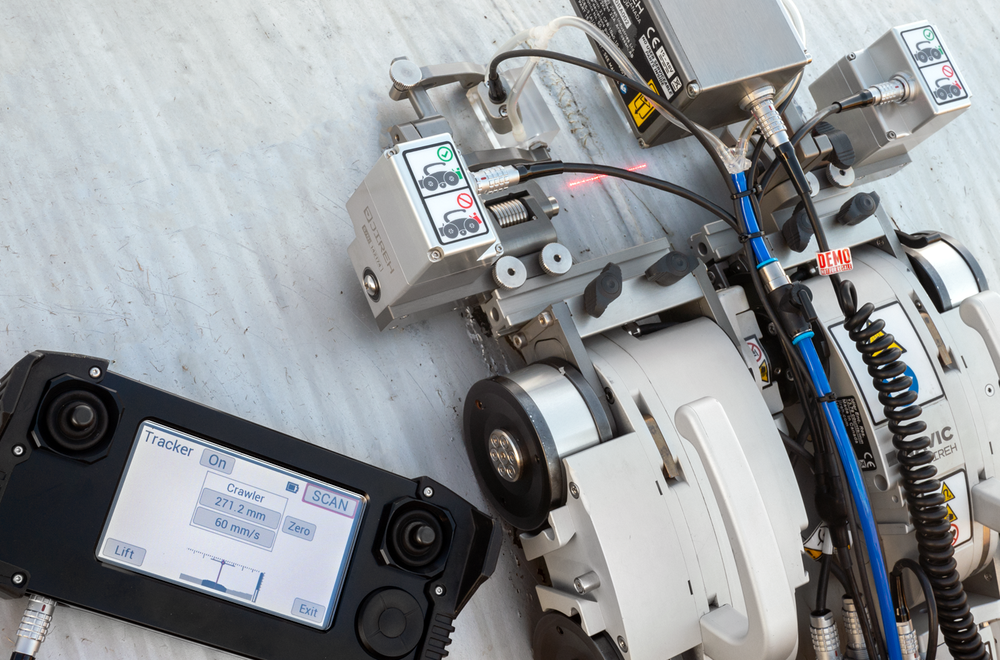
High probability of detection, accurate sizing and characterization of the flaws, all in compliance with the common codes
- Unique 3-click calibration wizards
- Simultaneous TFM, PAUT, TOFD multi-probe + multigroup configuration - one pass of the weld, all required data in single file for analysis
- Plane Wave Imaging (PWI) for high speed TFM imaging - typically 4x faster than Full Matrix Capture (FMC) based TFM
- Live volume corrected and fully merged views: Top (C), Side (B), End (D)
- Onboard volumetric merge
- Assisted analysis with optimal workflow to improve productivity of butt weld PAUT inspection analysis
- Phase Coherence Imaging (PCI)/TFM available in multi-group, acoustic sensitivity map, and face-to-face probe configurations
Ferrous Inspection
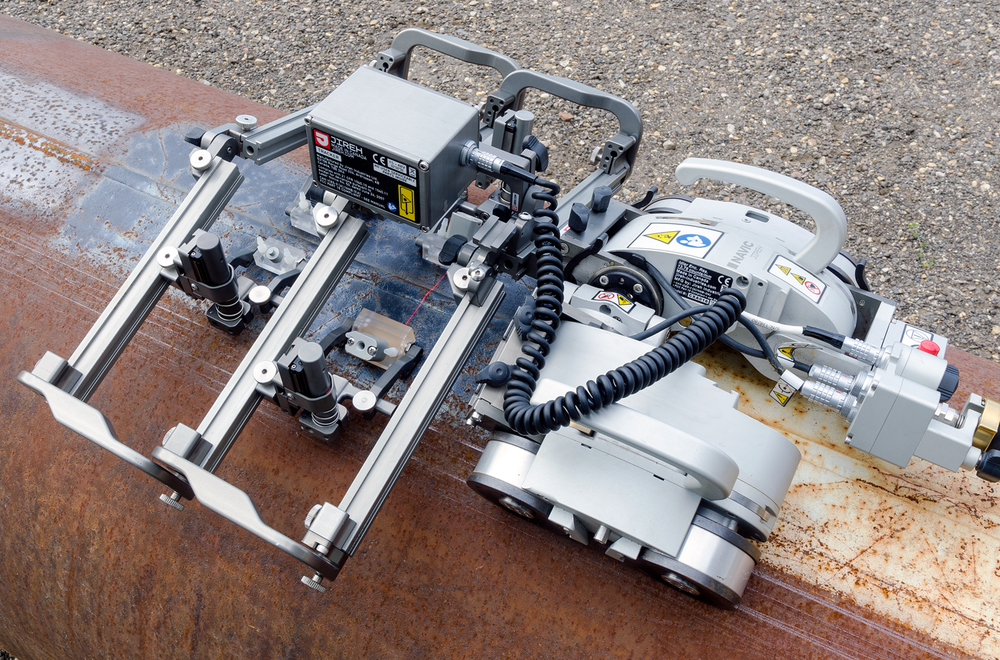
Our remotely controlled, steerable crawlers can accommodate up to six PAUT or TOFD probes simultaneously, enabling efficient inspection of various weld types, including circumferential, longitudinal, and spiral welds on pipes, plates, vessels, tanks, ship hulls, and nozzles. The inclusion of batteries enhances portability, allowing for flexible operation in diverse environments.
To support these applications, we offer accessories such as:
- Weld Tracking Optical Laser Guides: Improve alignment and probe positioning.
- HD Cameras: Facilitate remote navigation and visual inspection, ensuring high-quality data acquisition.
- Weld Frames and Tool Posts: Available in various configurations to suit specific inspection needs.
- Actuated Tool Posts: Elevate your probe holders over surface obstacles and welds during travel between inspection locations to transport your probes safely.
Non-Ferrous Inspection
For non-ferrous surfaces like stainless steel, GFRP/GRP, CFRP/CRP, and HDPE, our automated chain link system can mount up to four PAUT or TOFD probes in a single scan. The versatile system also allows for effective corrosion mapping as well as weld inspection, with attachments easily interchangeable to meet diverse inspection requirements.
Specifications
FERROUS INSPECTION SOLUTION
7.7kg (17lb)
- Height: 12.5cm (4.9in)
- Height w/o Handles: 8.1cm (3.2in)
- Width: 28.2cm (11.1in)
- Depth: 22.6cm (9in)
4.2kg (9.3lb)
- Height: 12.5cm (4.9in)
- Height w/o Handles: 8.1cm (3.2in)
- Width: 13.4cm (5.3in)
- Depth: 22.6cm (9in)
7cm (2.75in) OD to flat
30.5cm (12in) OD to flat
61cm (24in) to OD
7cm (2.75in)
7cm (2.75in) pipes under 20cm (8in), 8.15cm (3.2in) pipes over 20cm (8in)
23cm (9in)
13.78 counts/mm (22162.8 counts/in)
872.5 counts/mm (22162.8 counts/in)
161.3 counts/mm (4096 counts/in)
2.84 counts/degrees
Variable 0-25cm/sec (0-10in/sec)
10kg (22lb)*
100-240VAC, 50/60Hz, 3.5 Amps
Ferrous
1.36kg (3lb)
- Tracker: Automatically follow a weld profile
- Motorized Raster Arm: Two-axis, automated, corrosion scanning
- Backpack: Carry peripherals on the crawler
- Pre-Amp Bracket: Mount pre-amps to the crawler
- Motorized Couplant Pump: Consistent couplant supply
- Optical Guide: Guide crawler along welds
- Camera Mount: Monitor scanner operation
- CE: European Union CE Declaration – Compliance with essential requirements and provisions of European Union directives
- FCC: Compliance with Part 15 of FCC rules
- Industry Canada: CAN ICES-3 (A)/NMB-3(A) – This class A digital apparatus complies with Canadian ICES-003
-20°C (-4°F) to 50°C (122°F)
150°C (302°F)**
Dust-tight, watertight***
* Performance may vary with the surface type. Heavy payloads may require reduced speeds.
** The automated crawler medium temperature add-on kit is required when the inspection surface temperature measures between 50°C (122°F) and 150°C (302°F).
*** Not submersible.
NON-FERROUS INSPECTION SOLUTION
4.6kg (10.2lb)
- Height: 14.7cm (5.8in)
- Width: 20.6cm (8.1in)
- Depth: 26.2cm (10.3in)
- With Standard Overtop Link: 15.2cm (6in) to 106.7cm (42in)
- With Large Overtop Link: 20.3cm (8in) to 106.7cm (42in)
220.4 counts/mm (5598.4 counts/in)
9kg (20lb)*
Variable 0-14.2cm/sec (0-5.6in/sec)
100-240VAC, 50/60Hz, 1.4 Amps
30m (98.4ft)
Non-Ferrous and Ferrous
-20°C (-4°F) to 50°C (122°F)
Dust-tight, watertight**
- CE compliance
- FCC compliance
- Industry Canada compliance
- UKCA compliance
* Performance may vary with surface condition. Umbilical and attachments are considered payload.
** Not submersible.
ATTACHMENTS
- Raster Arm Module Encoder: 240.2 counts/mm (6101 counts/in)
- Raster Arm Module Speed: 0 - 76.2 cm/sec (0 - 30 in/sec)
- 300mm Raster Arm: 300mm (11.8in)
- 600mm Raster Arm: 600mm (23.6in)
- 900mm Raster Arm: 900mm (35.4 in)
- 11600mm Raster Arm: 11600mm (45.7in)
- 300mm Raster Arm (12in): 2.4kg (5.3lb)
- 600mm Raster Arm (24in): 3.33kg (7.2lb)
- 900mm Raster Arm (35in): 4kg (8.7lb)
- 1160mm Raster Arm (45in): 4.6kg (10.2lb)


