How to Achieve a Sweeping View of Composite Aerospace Assets
Ask an expertAerophobia, or the fear of flying, is prevalent among the general population and it really is no wonder given the increased exposure to media portraying theatrical crashes or other horrifying incidents. Operating in the non-destructive testing arena, stakeholders are responsible for preventing the next big blockbuster of an episode through thorough asset integrity assessments that help ensure travelers safely reach their destination. When considering the size and unique geometry of an aircraft, the inspection requirements are significant yet what is at stake is momentous; therefore, it is in the industry’s best interest to audit current risk management operations and take advantage of commercially available technology designed with field conditions in mind.
The Challenge
Ensure collection of complete inspection data to make informed decisions regarding an aerospace asset’s remaining useful life.
Within the aerospace sector, one will increasingly find assets featuring many different geometries, surface materials, and complexities such as thin specimens that require high near-surface resolution for optimal inspection results. These critical assets require regular assessments to not only validate their structural life and help plan preventative maintenance but also ensure the safety of passengers and crew onboard.
The variations in aircraft shape and material found within the fuselage, wings, skin, stringers, and spars pose a distinct challenge to inspectors. From an ergonomic point of view, carrying around multiple inspection devices is cumbersome and difficult given the often-complex access restrictions.
Being able to identify both near-surface, volumetric, and backwall flaws within these components as well as locate thinning in the material offers confidence that the aerospace asset being inspected is up to industry standards. On the other hand, spending all day interchanging inspection devices to achieve this result is simply not sustainable.
The Solution
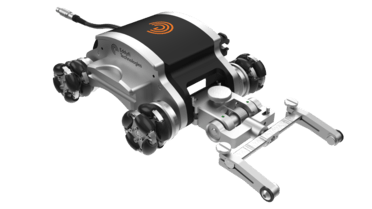
A 2D encoded manual scanner that is flexible, highly versatile, and ideal for full coverage ultrasonic testing examinations.


Eddyfi Technologies’ inspection solution addresses these challenges with the highly versatile NDT Sweeper and its ability to scan both flat and curved surfaces. This allows the inspector the freedom to complete a full inspection with minimal stops to swap inspection units. The NDT Sweeper is easily deployable and able to encode in raster scan over long distances, providing C-scan mapping of large composite parts. The scanner is a quick and efficient solution for the assessment of damaged or freshly repaired carbon fiber reinforced polymer surfaces as well as being perfectly suited for weld inspection on flat specimens. Its innovative design includes two integrated encoders; 2D scanning precision; non-marring wheels with integrated magnets that are safe to use on composites and easy to use on steel; a brake that locks the location of the scanner at the desired position; and individual probe suspension that can be fixed axially or laterally. The scanner can also support up to two phased array probes at the same time, reducing the initial investment on instruments and allowing for a seamless inspection while decreasing the length of inspection time required.
The small, lightweight, and ergonomic tool is combined with a high-resolution phased array ultrasound probe testing unit, TOPAZ®, and the powerful UltraVision® Touch onboard software for a complete inspection solution that allows for an efficient setup, recording of data, analysis, and reporting. With the integrated scanning sequence control offered by the ElbowFlex button it is possible for the inspection to be completed by a single operator. Integrated corrosion data analysis tools and an export C-Scan Data tool (*.txt file) enable transferring inspection data to proprietary customer software or Excel. The software also has a Software Synchro tool that permits the compensation for thickness variations of Aqualink wedges and outer diameter (OD) surface geometry variations.
Use Case: CFRP Plate Sample

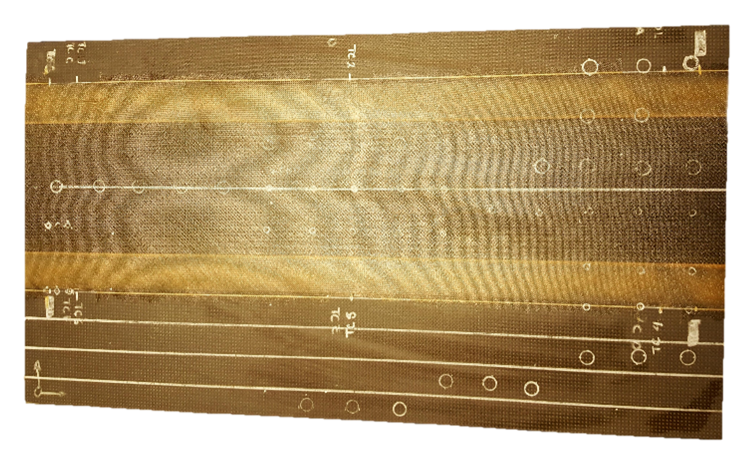
Figure 1: CFRP plate sample 600x320 millimeter (23.62 by 12.60 inches) plate, thickness varying from 1.0 millimeters (0.039 inches) to 3.2 millimeters (0.12 inches) with multiple surface finishes and brass inserts to simulate delamination
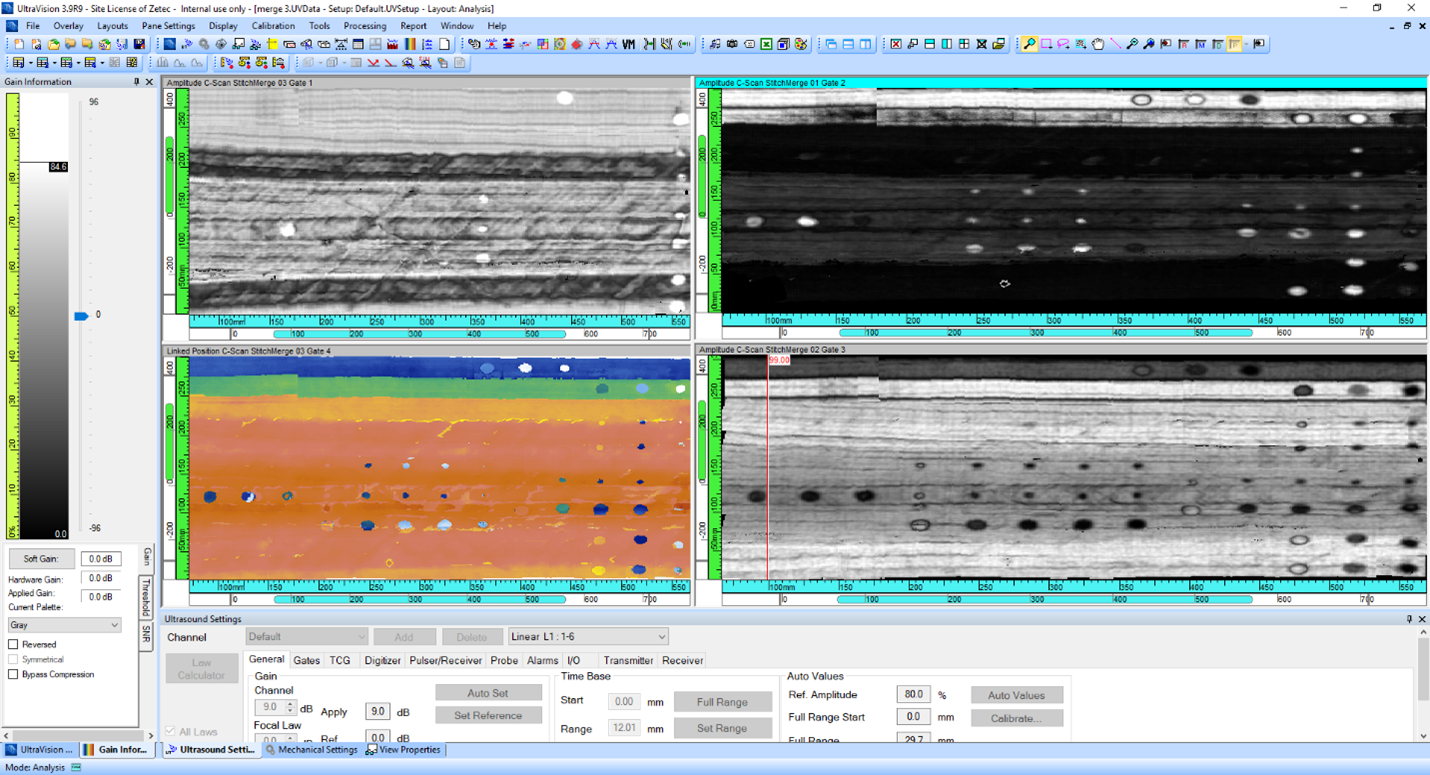
Figure 2: Results

Figure 3: Interface Signal

Figure 4: Volume

Figure 5: Backwall

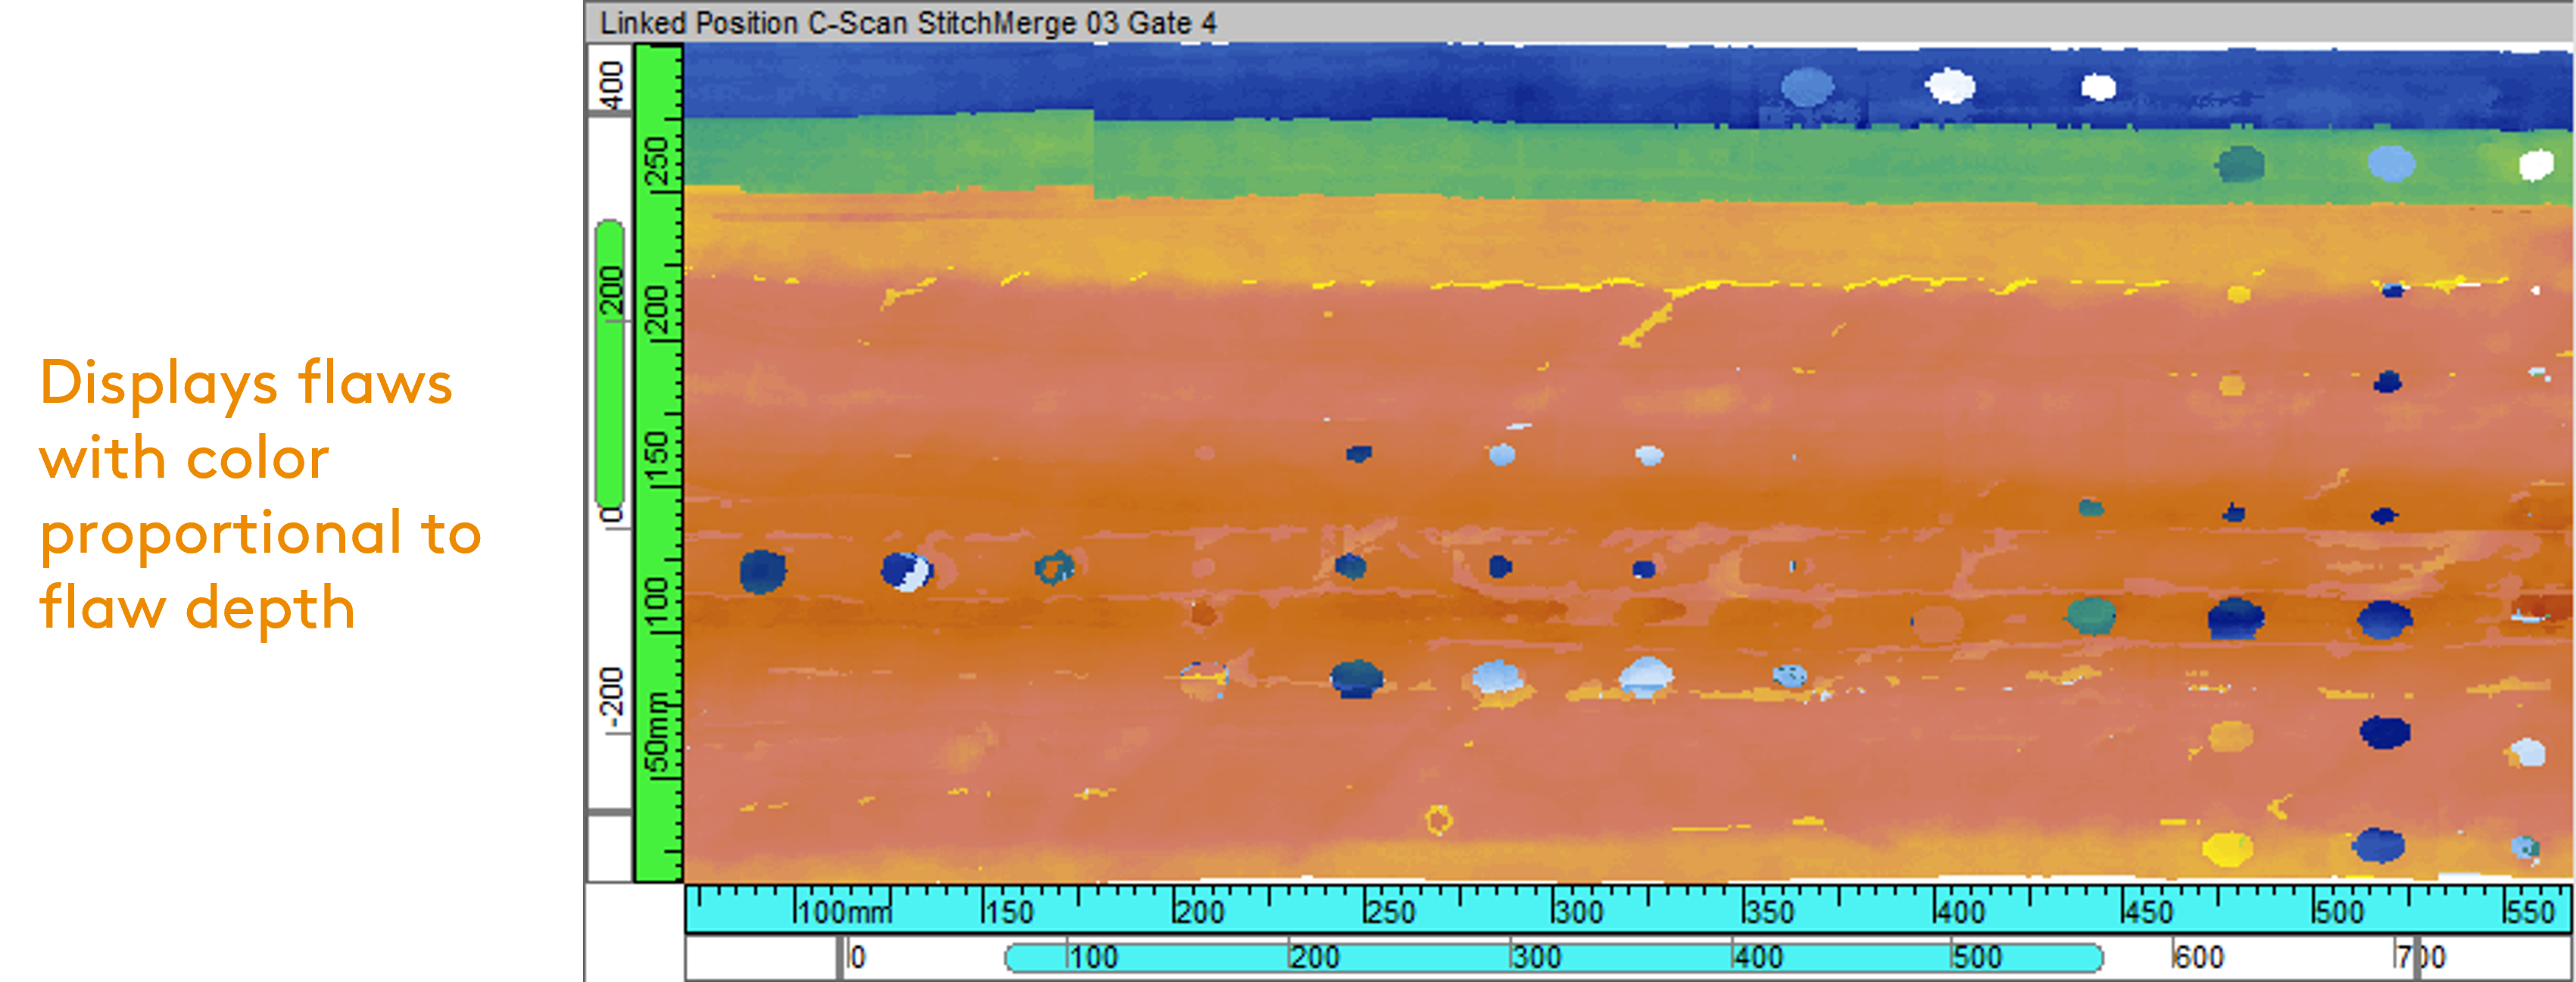
Figure 6: Position C-scan

Use Case: Helicopter Blade Inspection
A customer required the inspection of Sikorsky Helicopters blades made out of composite bonded to titanium. A complete solution composed of seven TOPAZ instruments, four NDT Sweepers as well as four local immersion probes was so efficient, they started preparing another PO shortly after.

Benefits
- Confidence in data results as dedicated probe design provides optimal probability of detection and improved visibility for composite inspections.
This well-rounded inspection package makes for an easily deployable unit. Varying compatible probe designs optimized for a variety of inspections allows the inspector to work through their project without compromising quality. The near-surface resolution is improved with the composite impedance matching tool. Allied with the line of powerful TOPAZ phased array units makes for a compact solution.
Being thorough is key to a high-quality trustworthy inspection, but thorough does not have to mean lengthy inspections comprised of multiple different technologies. Our solutions can help you achieve not only faster inspections, but also more complete and reliable data with less when inspecting complex composite assets in the aerospace sector.